Salesforce Einstein Discovery elevates your business intelligence by incorporating statistical modeling and supervised machine learning into a coding-free environment that facilitates swift iteration. This platform seamlessly generates models from the provided data, enhancing efficiency and eliminating the need for manual coding.
Prerequisites:
1. Create/Have an Einstein Salesforce account.
- Go to https://trailhead.salesforce.com/promo/orgs/analytics-de
- Fill in the form with a legitimate email address.
- After completing the form, press the “Sign me up” button to trigger a confirmation message.
- Once you receive the activation email, open it and follow the provided link.
- Complete your registration by creating a password and responding to challenge questions.
- Click “Save” to effectively access your CRM Analytics Developer Edition org, subsequently being guided to the Setup page.
2. Install/Have a Postman.
- Download Postman: https://www.postman.com/ and download the latest version suitable for your operating system.
- Install Postman: Run the installer and follow the on-screen instructions to complete the installation.
3. Basic understanding:
- Salesforce documentation: https://developer.salesforce.com/docs/
- Postman documentation: https://learning.postman.com/docs/introduction/overview/
How can one go about implementing an Einstein Prediction Services using Postman: Einstein Discovery solution?
Step 1: Initiate the Einstein Prediction Service.
Step A: Discover Einstein Prediction Service.
Einstein Prediction Services constitutes a publicly accessible REST API service designed to facilitate programmatic interaction with models and predictions powered by Einstein Discovery.
Step B: Explore Models and Definitions of Predictions.
In Einstein Prediction Services, predictions are facilitated through the engagement with two key components: models and prediction definitions.
Model: Models refer to the intricate, tailored mathematical structures generated by Einstein’s Discovery. These models serve as the foundation for predicting outcomes within the context of Einstein Discovery’s capabilities.
Prediction Definitions: In the Einstein Prediction Service, each model is associated with a container entity referred to as a prediction definition.
The depicted diagram illustrates the sequence of events involved in submitting a prediction request to a prediction definition comprising a solitary mode.
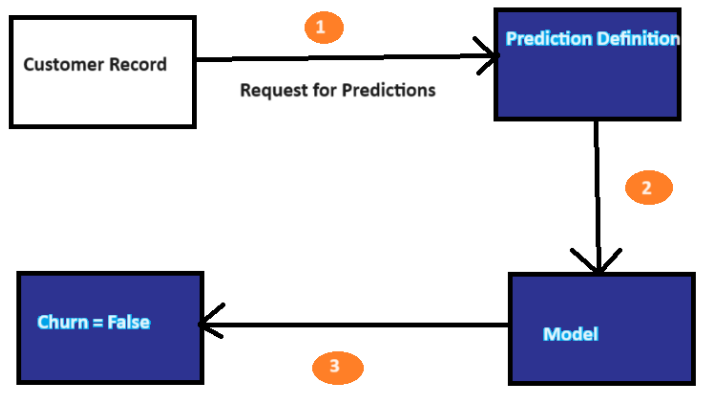
In this scenario, the prediction request (1) sends predictor variables from the customer record to the prediction definition, evaluating the likelihood of customer churn. The prediction definition then forwards the input data to the model (2), which generates the prediction. This computed prediction is then communicated (3) in the response to the requester.
Step 2: Configure Prediction Settings within Salesforce.
Einstein Discovery simplifies the process of deploying a model swiftly through user-friendly, click-based tools. By leveraging statistical analysis, machine learning, and artificial intelligence, Einstein Discovery conducts an exhaustive examination of data.
Step A: Prepare the Data:
Utilize the provided dataset, “SuperStore-order.csv,” to generate and populate a Customer Relationship Management (CRM) Analytics Dataset.
Access Analytics Studio through the App Launcher.
- Navigate to Create > Dataset > Choose CSV File > Pick “SuperStore-orders.csv” > Proceed to the next step.
- Specify the Dataset Name and choose the desired App for dataset creation before moving on to the next stage.
Step B: Construct a Model:
In the process of creating a model in Einstein Discovery, the initial step involves modifying the dataset previously established.
Following this, click on “Create Model.”
- Define the model goal on the Einstein Discovery screen, specifying the desired outcome like Sales per Customer and choosing to maximize it. Click “Next” and opt for the “Automated” model creation. Einstein then employs a mix of statistical methods, machine learning algorithms, and artificial intelligence for analysis.
- The R2 (r-squared) value, a metric indicating the model’s quality for numeric use cases, is presented by Einstein.
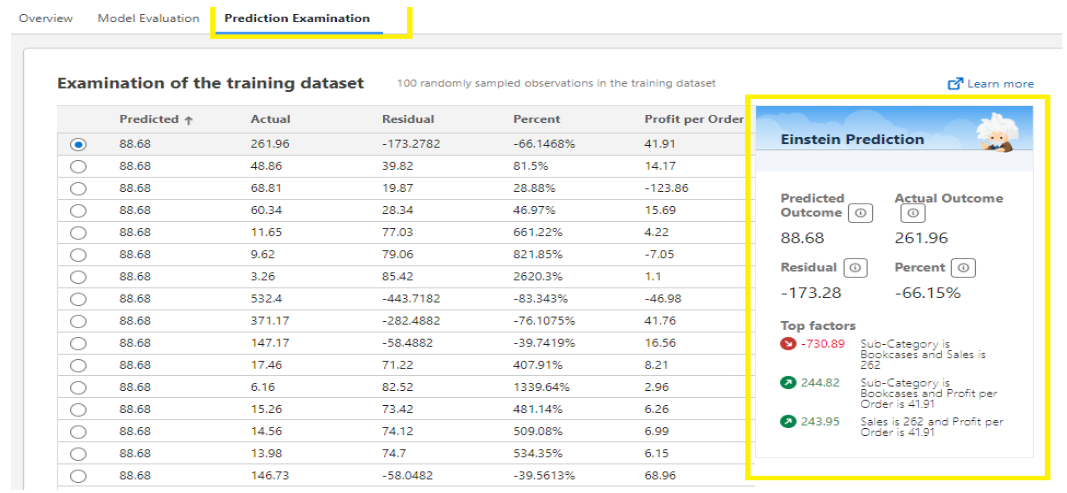
- Navigate to “Prediction Examination” and observe the right panel, which provides a comparison of the predicted outcome with the actual outcome for the selected row in the training data.
Step C: Implement the Model:
- Navigate to the “Overview” section and locate “Ready for Launch?” Click on “Deploy Model.”
- Proceed by selecting “Get Started.” When providing model details, keep the default settings, including the Prediction Definition name set as “Predicted Sales per Customer.” Click “Next” to proceed.
- Under the section titled “Connect to an Object,” choose the option “Deploy without connecting to a Salesforce Object” and proceed by clicking “Next.”
- For segment predictions, opt for “Don’t customize” and then click “Next.”
- Choose “Quantity” for actionable variables and click “Next.”
- For customized predictions, select “Don’t customize” and click “Next.”
- Review the deployment settings and finalize the process by clicking “Deploy.”
- Einstein will deploy the prediction definition along with your model into Salesforce, showcasing it in Model Manager.
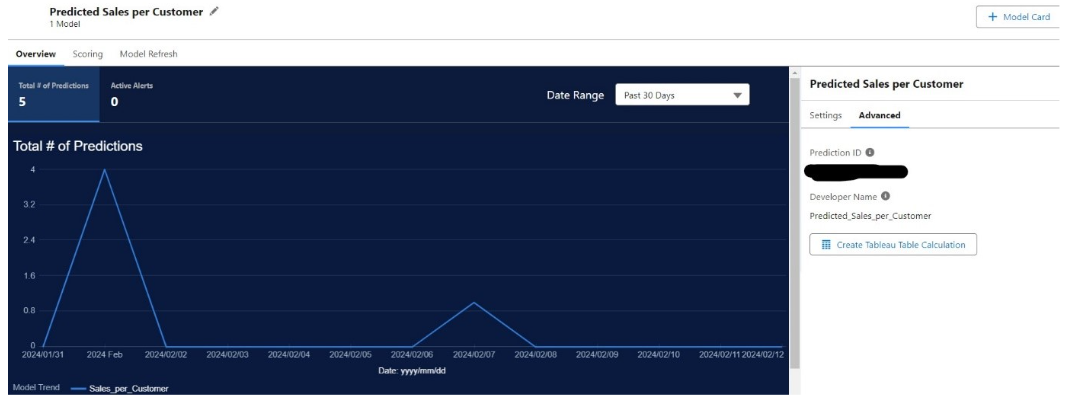
Navigate to the “Advanced” subtab and make note of the Prediction ID. It’s crucial to copy this ID and save it for future reference, as it helps identify the specific prediction definition you intend to use.
Step 3: Retrieve Predictions via a REST Request.
Utilize the Einstein Prediction Service to obtain predictions through your preferred REST client.
Step A: Establish a Connected Application within the Salesforce platform.
- Navigate to the Quick Find Box and go to “Apps” and then “App Manager.”
- Create a new Connected App.
- Specify a name for the Connected App under “Connected App Name.”
- Input the email address into the designated field labeled “Contact Email.”
- Check the “Enable OAuth Settings” checkbox.
- Set the Callback URL to https://login.salesforce.com/
- Navigate to the “Selected OAuth Scopes” section and select both “Access Analytics REST API resources (wave_api)” and “Manage user data via APIs (api).”
- Save your settings and then click “Continue.”
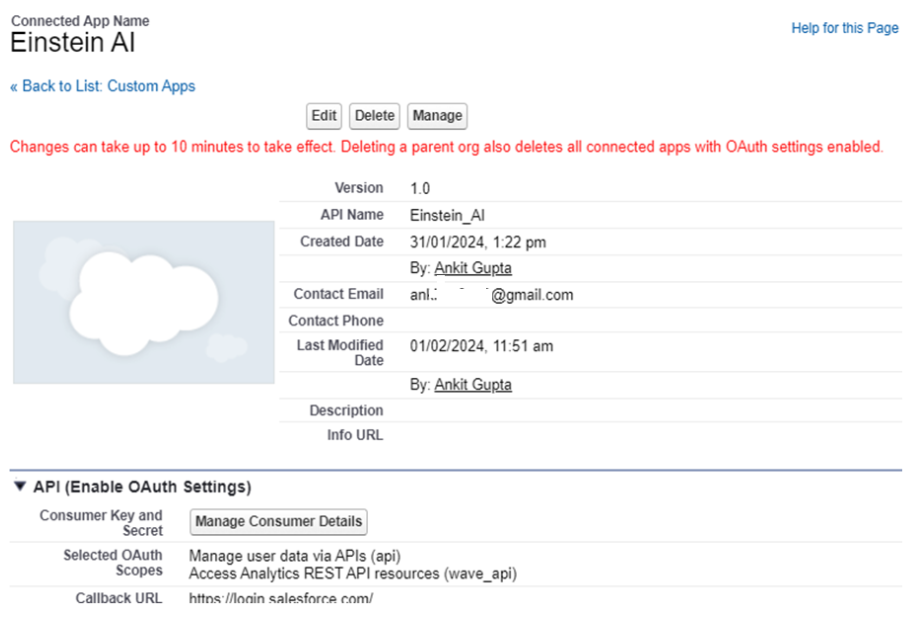
- Navigate to “Manage Consumer Details” and retrieve both the Consumer key and secret.
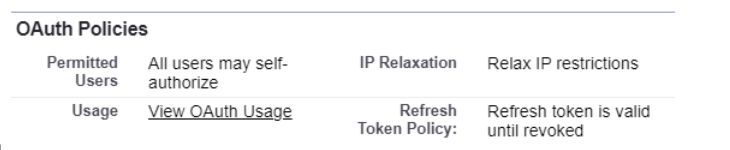
- Access the “Connected App” section, proceed to “Manager,” and then select “OAuth Policies.”
Step B: Configure authentication in the REST Client to obtain the Access Token and Instance URL
Setting up authentication in your REST client using the recently created Connected App credentials is vital for accessing the Einstein Prediction Service. Authentication is a mandatory step for utilizing the service.
How to Generate Access Token and Instance URLs?
- Open your preferred web browser and log into Salesforce. In a new tab, enter the following request URL:
- https://<YOUR_INSTANCE>.salesforce.com/services/oauth2/authorize?response_type=code&client_id=<CONSUMER_KEY>&redirect_uri=https://login.salesforce.com/
- If prompted, allow access. The browser will redirect to a URL similar to the following, from which you can obtain the authorization code:
- Open Postman.
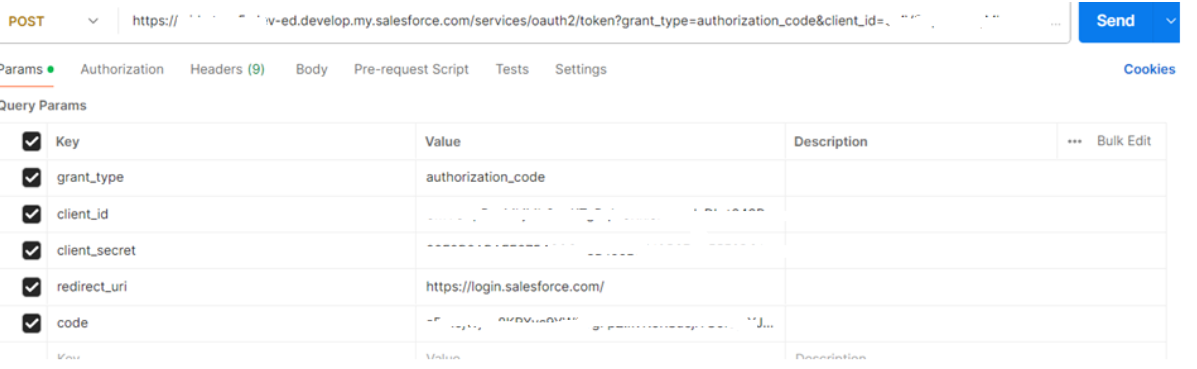
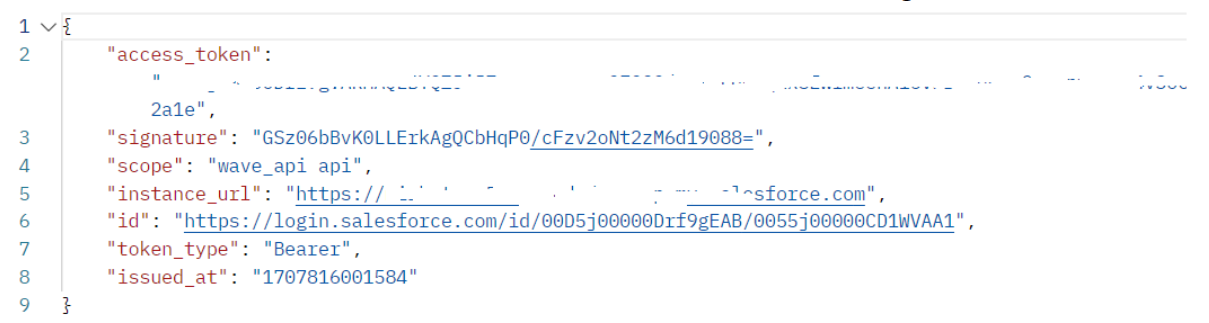
- Retrieve the access token and instance URL using the obtained auth.
Step C: Retrieve a list of Prediction Definitions currently available.
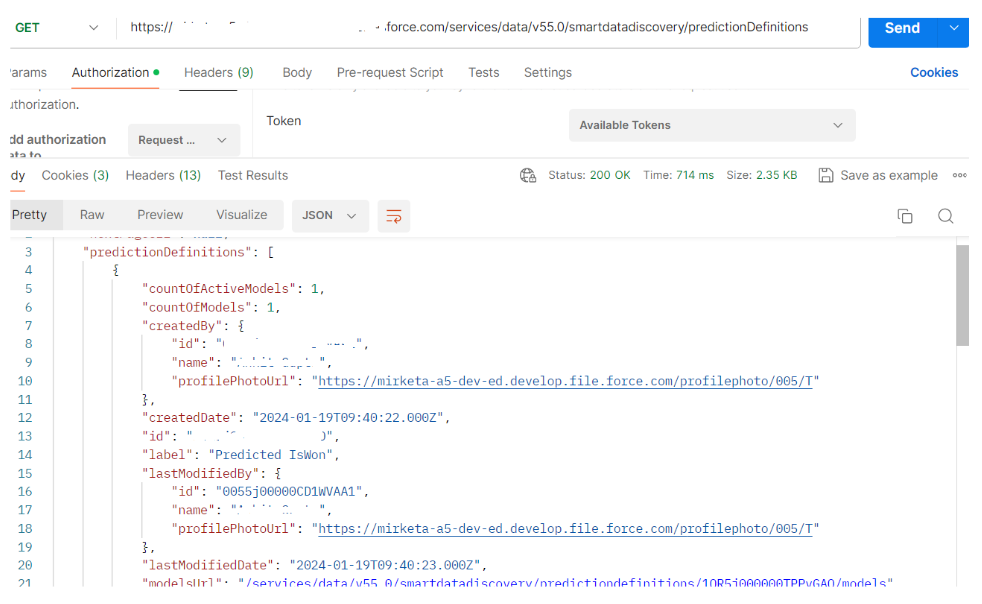
- Create a new GET request and name it as “Get Prediction Definitions.”
- Set the Request Type to GET and the Request URL to instance_URL/services/data/v55.0/smartdatadiscovery/predictionDefinitions.
- Navigate to the Authorization tab.
- Choose Authorization Type as OAuth 2.0.
- Insert the access token into the designated field labeled “Set Access Token” in your document.
- Save the request configuration.
- Click the “Send” button to execute the request.
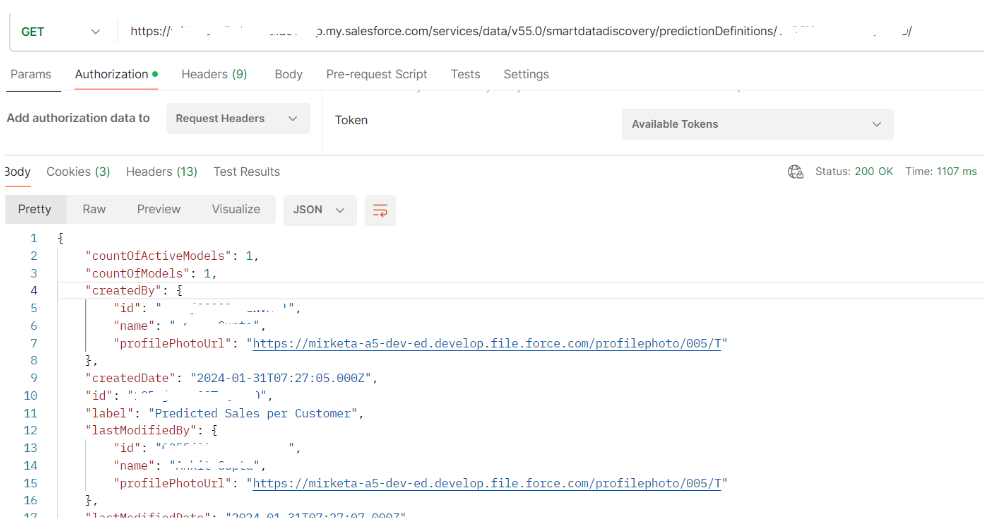
Step D: Obtain metadata for a specific Prediction Definition.
- In Step 3, the response contains the URL for fetching metadata related to the prediction definition created earlier. Please create a new GET request, name it “GET Prediction Definition,” and replace the URL with the following string:
- https://InstanceUrl/services/data/v55.0/smartdatadiscovery/predictionDefinitions/ID
- Note that ID is the identifier copied from the previous “Set Up Predictions in Salesforce” step.
- Execute the request by clicking “Send” and examine the resulting response.
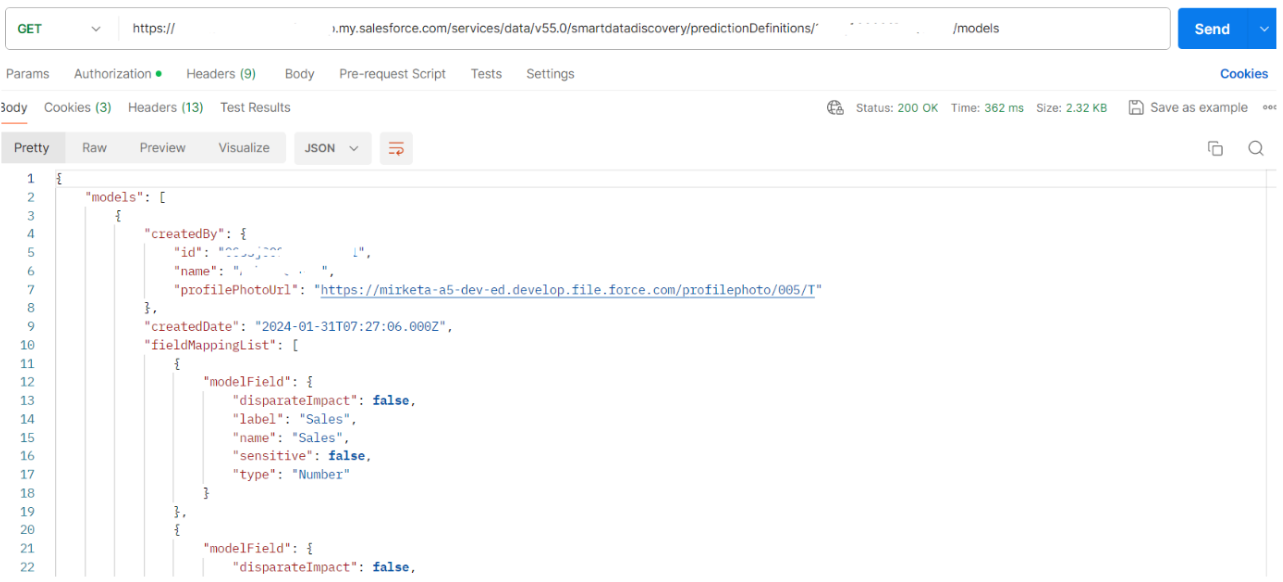
Step E: Retrieve a list of Models associated with a particular Prediction.
- In Step 4’s response, there is a URL provided for obtaining metadata related to the previously deployed model. Introduce a new GET request named “Get Models” and replace the existing request string in the URL with the following:
- https://InstanceURL/services/data/v55.0/smartdatadiscovery/predictionDefinitions/ID/models
- Execute the request by clicking “Send” and analyze the resulting response.
Step F: Acquire predictions using the specified methodology.
- Create a new request named “Get Predictions” with the following configurations:
- Request Type: POST
- Request URL: instance_URL/services/data/v55.0/smartdatadiscovery/predict
- Configure the Authorization Settings with the appropriate Authorization Type and Access Token.
- For the POST call, define the request body as follows:
- Body Type: RAW
- Body Type Request: JSON
- Include the following JSON-formatted request body:
{
“predictionDefinition”: “1OR5j000000TPQ5GAO”,
“type”: “RawData”,
“columnNames”: [“Quantity”, “Category”, “Sub_Category”, “Sales”, “Profit_per_Order”],
“rows”: [
[“2”, “Furniture”, “Chairs”, “262”, “42”]
],
“settings”: {
“maxMiddleValues”: 2,
“maxPrescriptions”: 2
}
}
- Ensure that you replace “yourPredictionDefinitionId” with the actual Prediction ID obtained earlier (ID).
- The “maxMiddleValues” parameter is set to 2 to enable the return of top factors, and “maxPrescriptions” is set to 2 to enable the return of improvement suggestions.
- Save the request, click “Send,” and review the response.
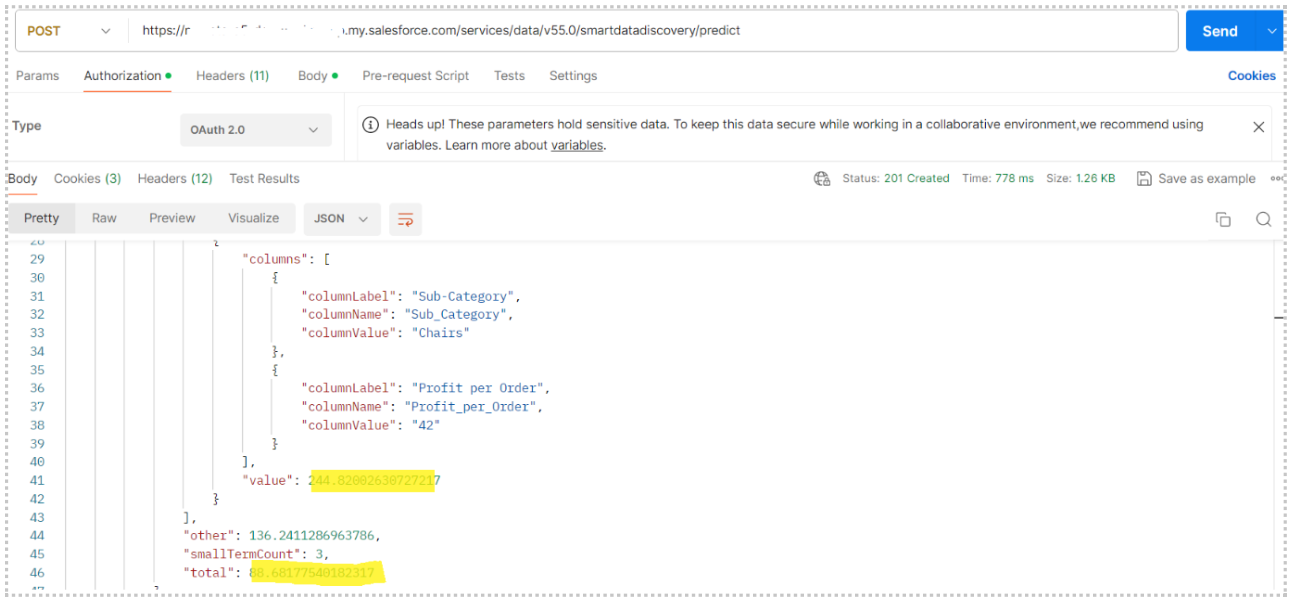
In this context:
“Total” signifies the predicted value.
The “Middlevalues” segment outlines the primary influencing factors associated with this prediction.
Illustration:
- When the Sub Category is “chairs” and the Sales amount is 262, it results in a deduction of approximately 731 from the prediction (-730.8852).
- If the Sales amount is 262, it leads to an elevation in the prediction by approximately 245 (244.8200).
Step 4: Involves evaluating the monitoring of usage.
Einstein Discovery continuously monitors real-time usage statistics for your organization. To access these statistics, navigate to Setup, use the Quick Find Box to search for “discovery,” and select “Usage.”
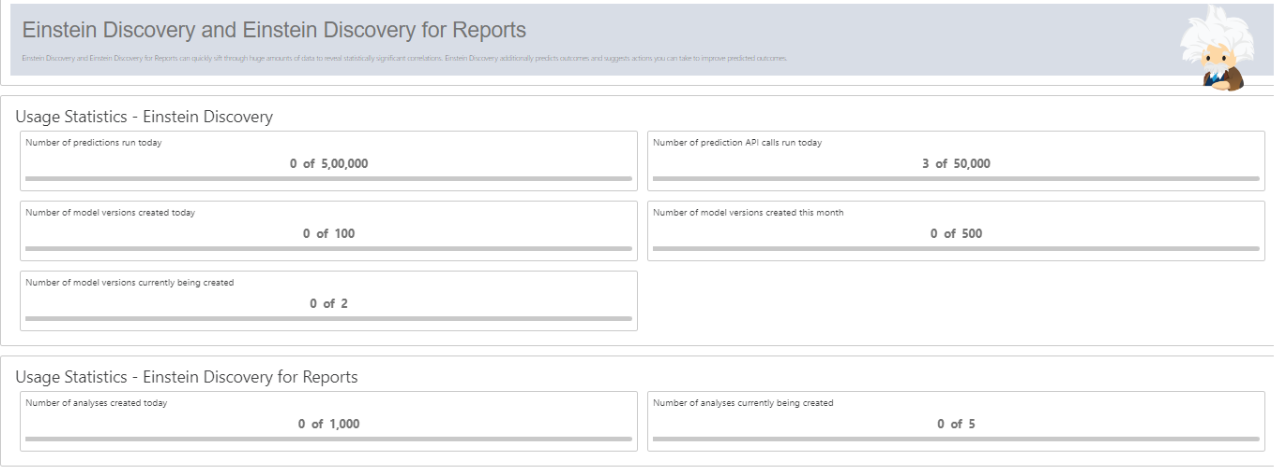
Einstein meticulously monitors REST API requests and other automated prediction inquiries, organizing them within the classification of “Number of prediction API calls run today.”
Conclusion:
In summary, the outlined process encompasses initiating the Einstein Prediction Service in Salesforce, configuring settings, preparing data, constructing and implementing models, and retrieving predictions through REST requests. The conclusion underscores the critical importance of evaluating usage monitoring to ensure optimal system performance and utilization. This systematic approach aims to enhance predictive analysis within the Salesforce platform.
Leave A Comment