In today’s business world, sharing data between different parts of your organization is important. This blog will give you a straightforward, step-by-step guide on how to send information from one Salesforce org (let’s call it Org A) to another (Org B) using Salesforce Integration. In Org B, we will create a Connected App using the API. In Org A, we’ll set up an Authentication Provider and a Named Credential. Whether you’re an experienced Salesforce admin or new to the platform, this guide will help you learn how to move data between your orgs without any hassle. Let’s get started! In today’s business world, sharing data between different parts of your organization is important. This blog will give you a straightforward, step-by-step guide on how to send information from one Salesforce org (let’s call it Org A) to another (Org B) using Salesforce Integration. In Org B, we will create a Connected App using the API. In Org A, we’ll set up an Authentication Provider and a Named Credential. Whether you’re an experienced Salesforce admin or new to the platform, this guide will help you learn how to move data between your orgs without any hassle. Let’s get started!
Prerequisites:
1. Create/Have two Salesforce accounts (Org A and Org B)
- Go to the Salesforce website by visiting https://login.salesforce.com/?locale=in.
- Click on the “Try for Free” option.
- Select the type of Salesforce account you want and fill in your personal and company information.
- Create a username and password, add your phone number, and agree to the terms and conditions.
- Finish setting up your account, which includes configuring security settings and providing your organization’s details.
2. Basic understanding of Salesforce
Salesforce documentation: https://developer.salesforce.com/docs/
Here are the steps for How to send information from one Salesforce Org A (Source Org) to another Org B (Target Org) using Salesforce Integration.
Step 1: Create Objects and Fields.
- Follow the same steps in Org A and Org B.
- Go to Setup – Object Manager – Create Object
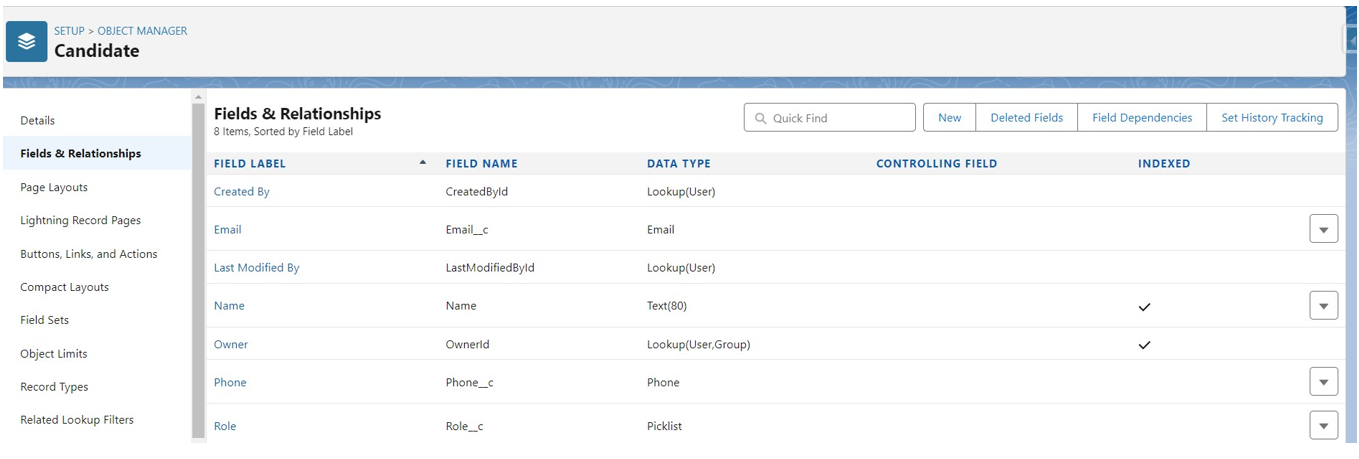
- Object – Candidate
- Create Field – Go to Field & Relationship of the Candidate Object.
Step 2: Remote Site Setting (Org A)
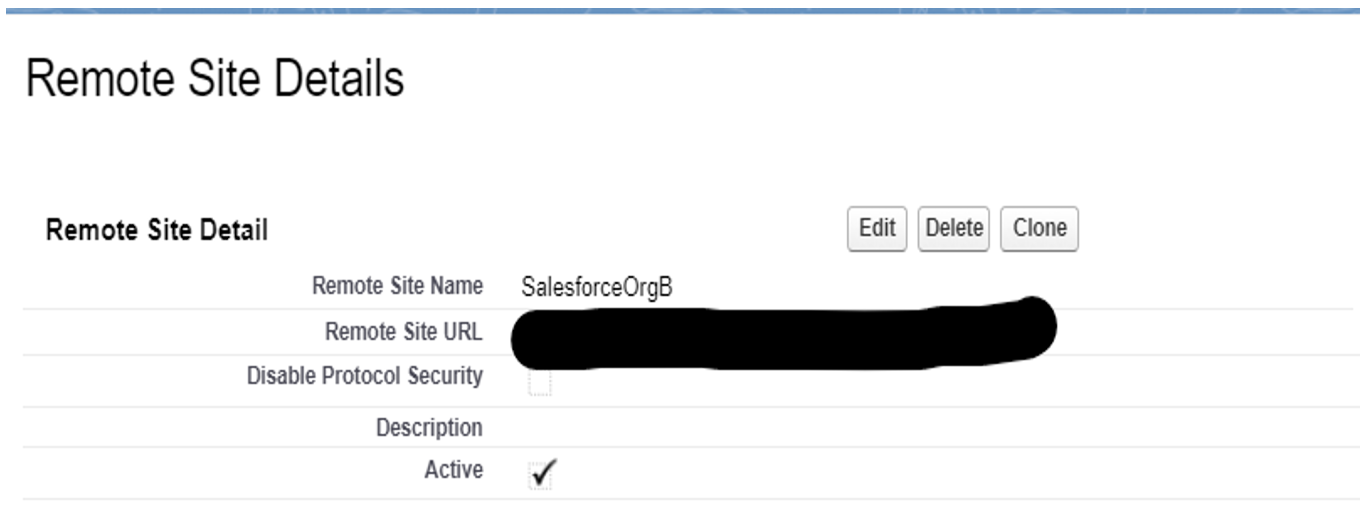
Remote Site Setting is a configuration that allows your organization to access external websites or services securely.
- Go to Setup – Quick Find Box – Remote Site Settings
- Click on New Remote Site
- Remote Site URL – Give the URL of your Org B.
Step 3: Create a Connected App (Org B)
A Connected App in Salesforce is a secure way to integrate external applications and services with your Salesforce org, allowing for seamless data sharing and interaction while maintaining security and control.
- Go to setup – Quick Find Box – App Manger – New Connected App.
- Give Connected App Name, Contact Email, and Contact Phone.
- Click on Enable OAuth Settings.
- Callback URL – Paste the callout of auth. Provider (Org A) as of now, LocalHost: 3000
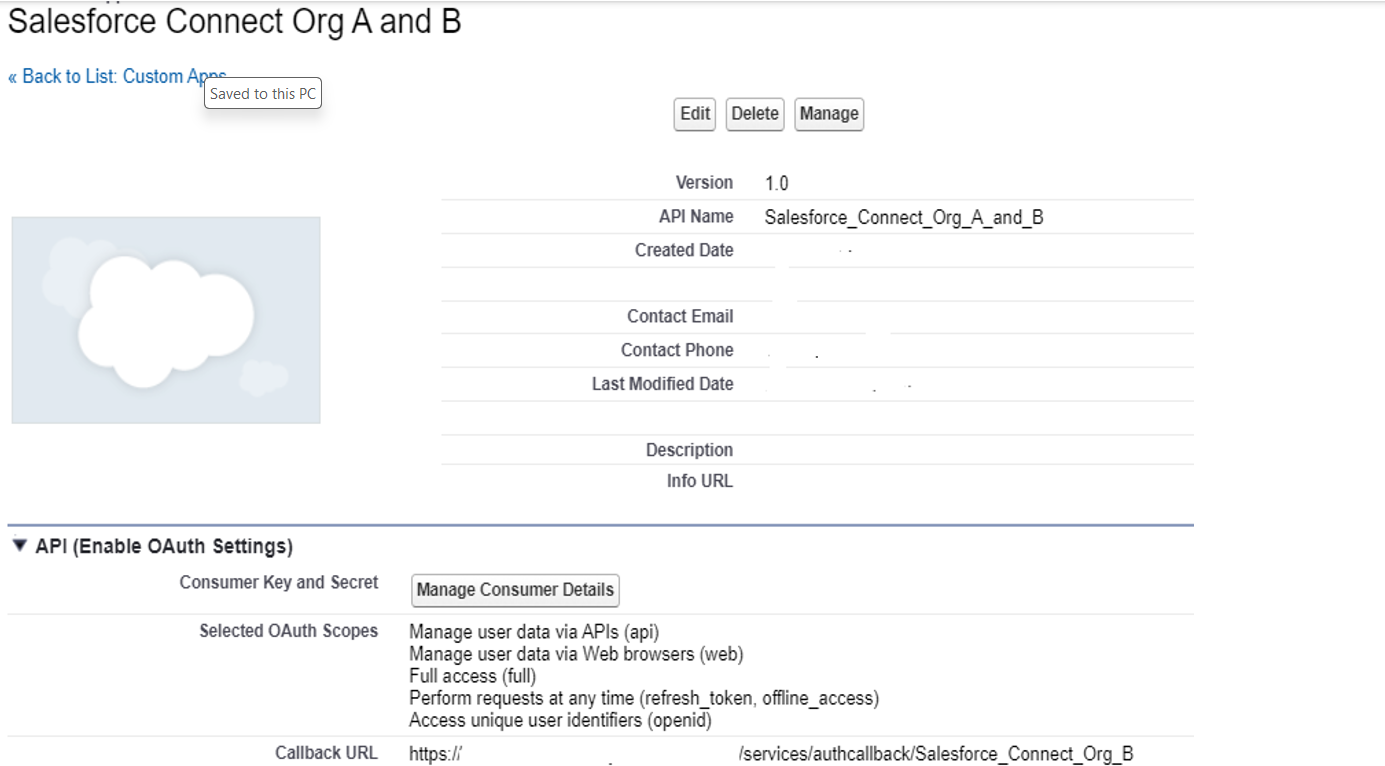
- Click on Manager Consumer Details after creating a connected App.
- Copy the Consumer key and Consumer Secret key.
Step 4: Create Auth. Provider (Org A)
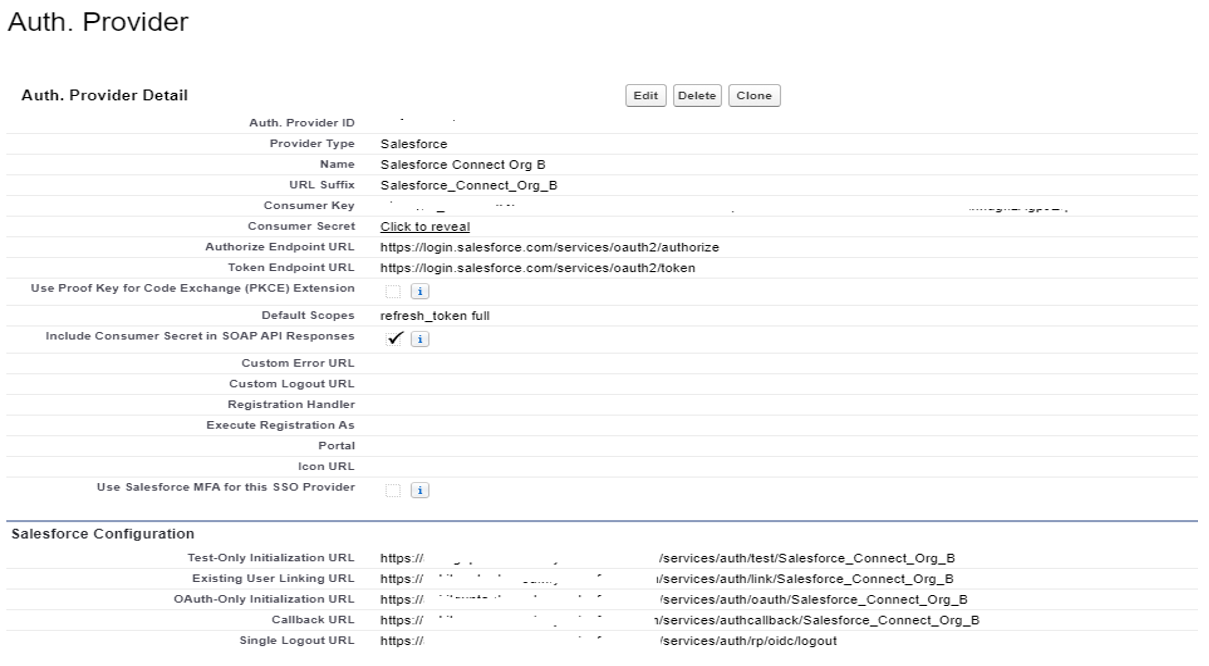
An Auth. Provider in Salesforce is a feature that allows you to configure and manage external identity providers, enabling users to log in to Salesforce using their credentials from those providers.
- Go to Setup – Quick Find Box – Auth. Provider – New – Choose Provider – Salesforce.
- Give Auth. Provider Name, Paste Consumer Key, and Consumer Secret key of the connected app.
- Copy the Callback URL after creating auth. Provider.
- Paste the callback URL in the connected app (Org B).
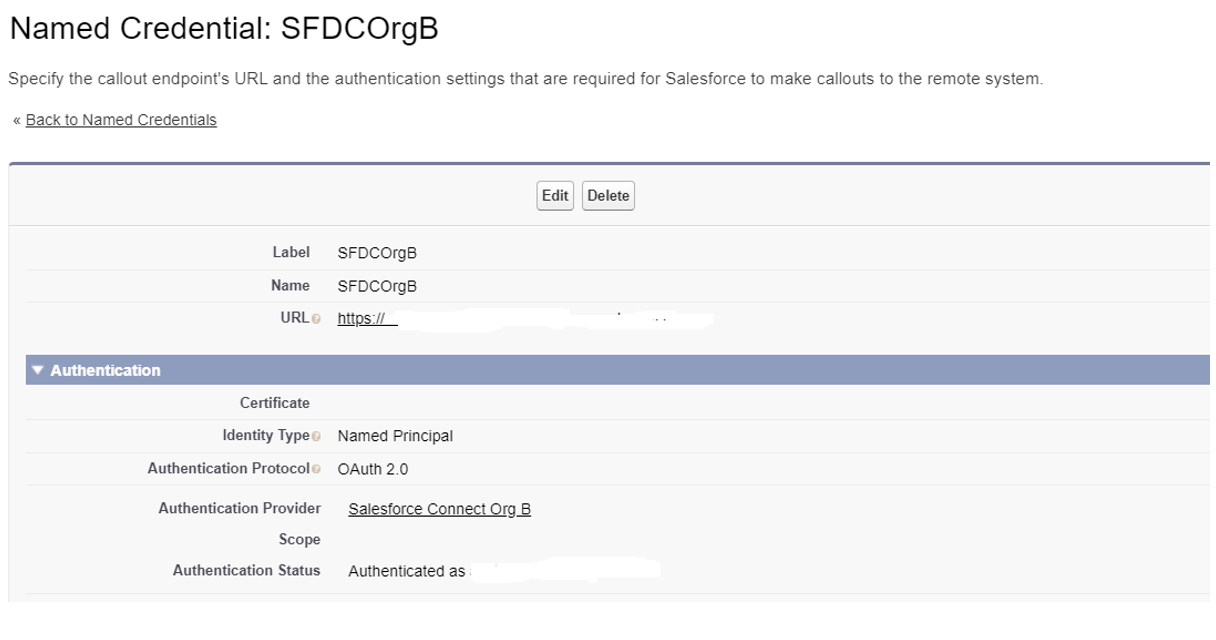
Step 5: Create Named Credential (Org A)
In Salesforce, a Named Credential is a secure way to store and manage authentication information for external services or APIs, allowing for easy integration without exposing sensitive credentials in your code.
- Go to Setup – Quick Find Box – Named Credentials – New Legal
- Give Label, Name, and URL (Org‘s B URL).
- Identity Type – Named Principal, Authentication Protocol – OAuth 2.0, and choose Auth. Provider that you have created previously.
Step 6: LWC Component
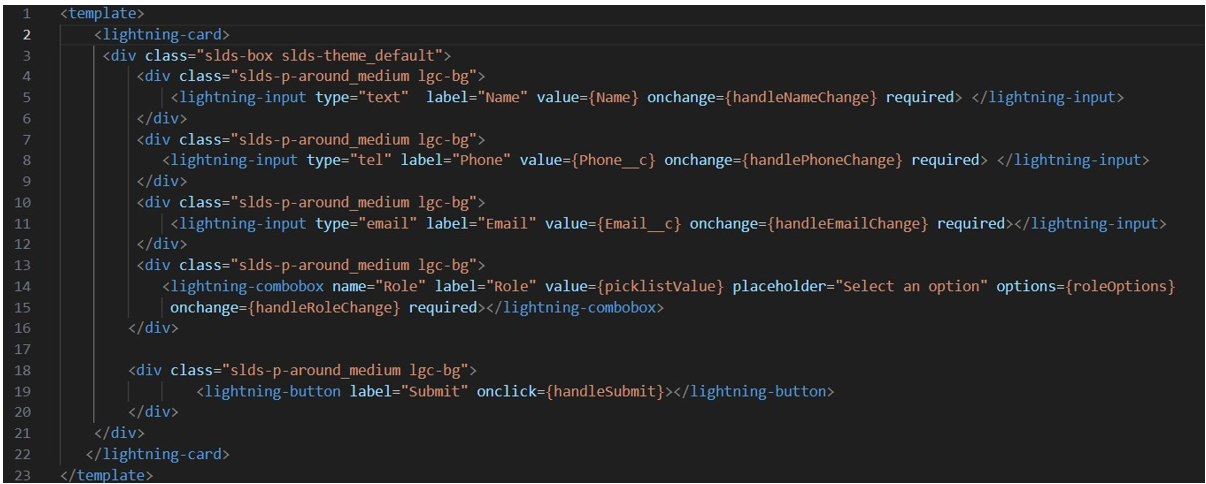
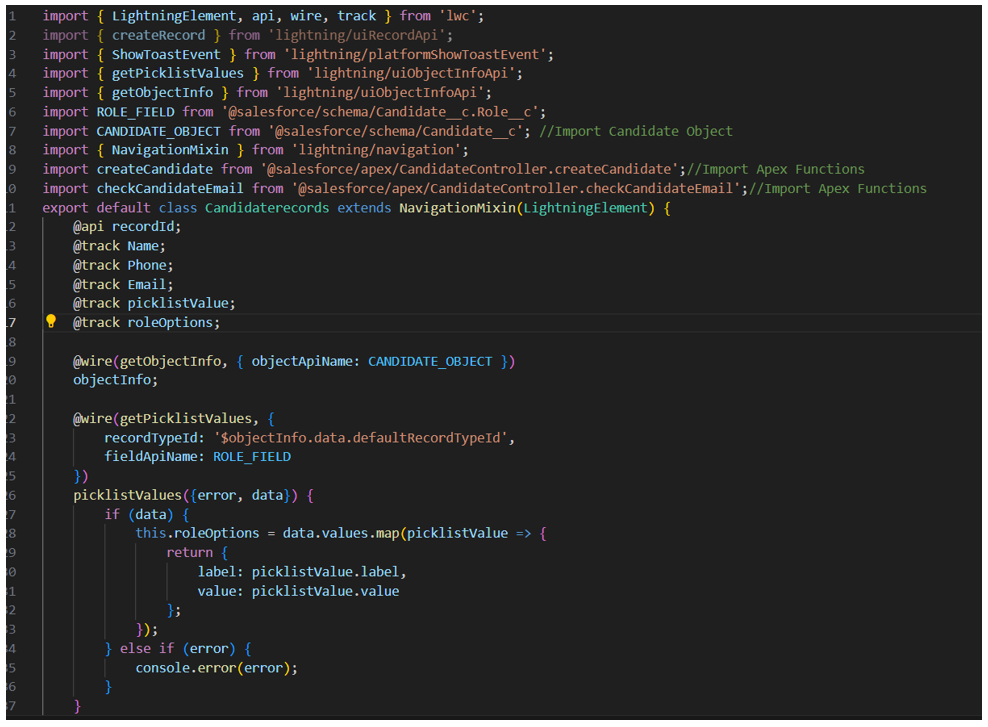
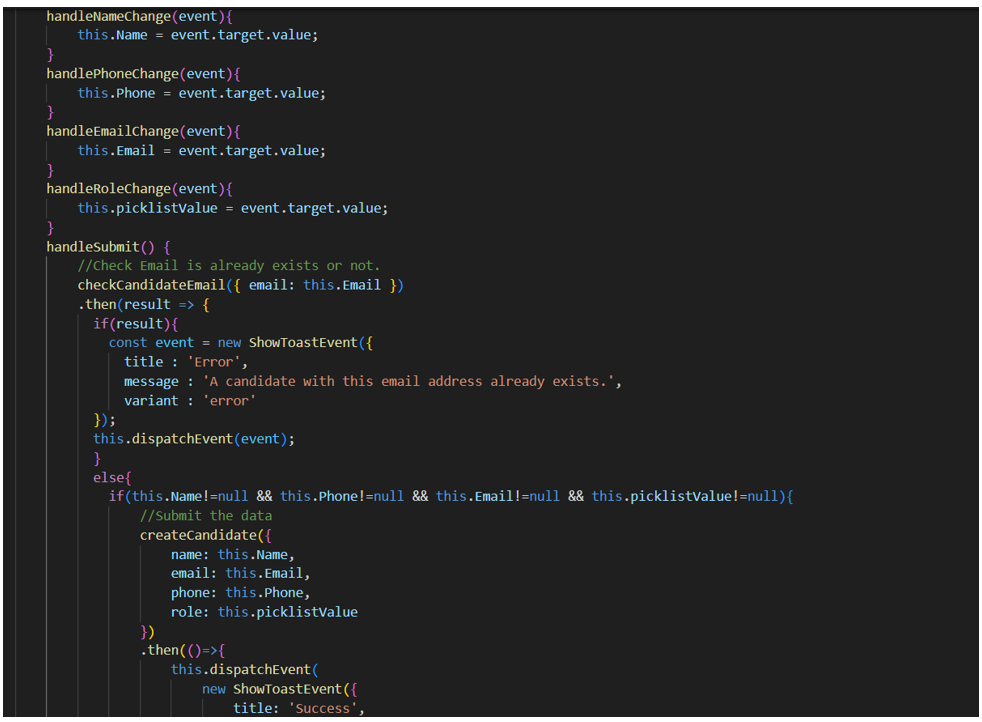
Created LWC Component for submit date from the candidate – candidateRecord.
HTML: candidateRecord.Html
Use 3 Lightning-input and 1 Lightning-combobox.
- JS: candidateRecord.js

Validation
Added two validation rules that are
- When Email already exists – A candidate with this email address already exists

- Submit the record without entering the required values – Please Enter the required values.

Step 7: Apex Controller Step
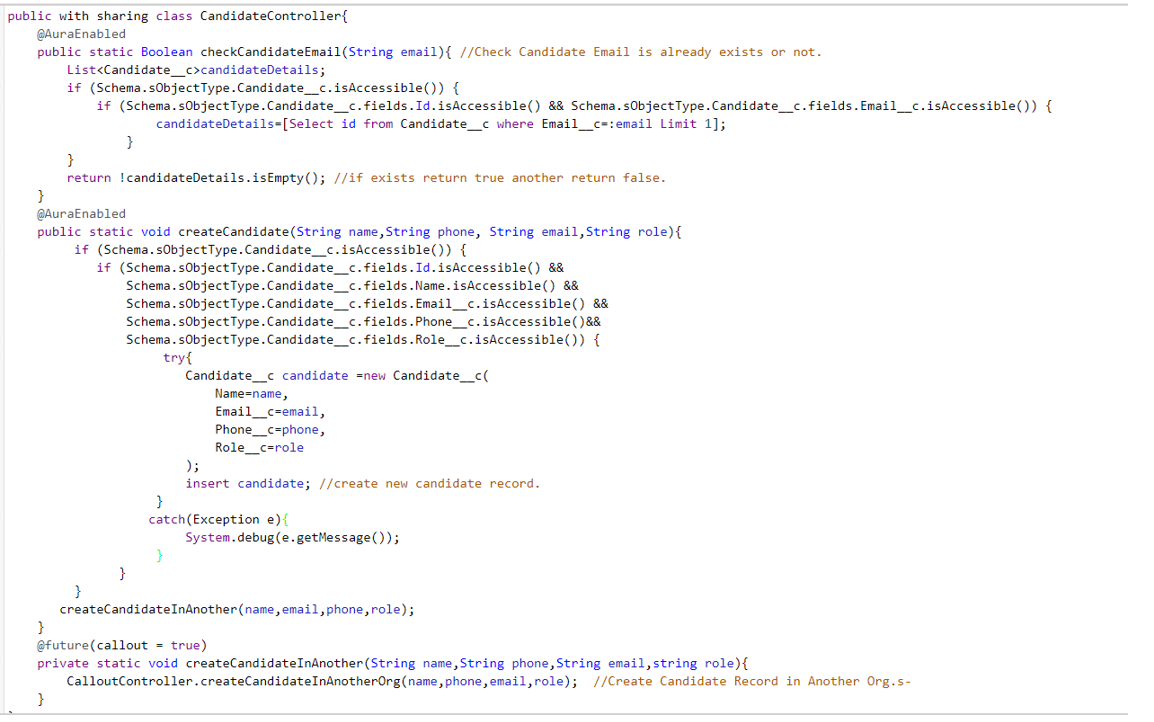
8: Callout
- Send the API request and create the record Org B also.
- //request.setEndpoint(‘callout: NamedCredential of Org A/services/data/v52.0/sObject/Object API of Org B’);

Step 9: Show the Record in Org A and Org B.
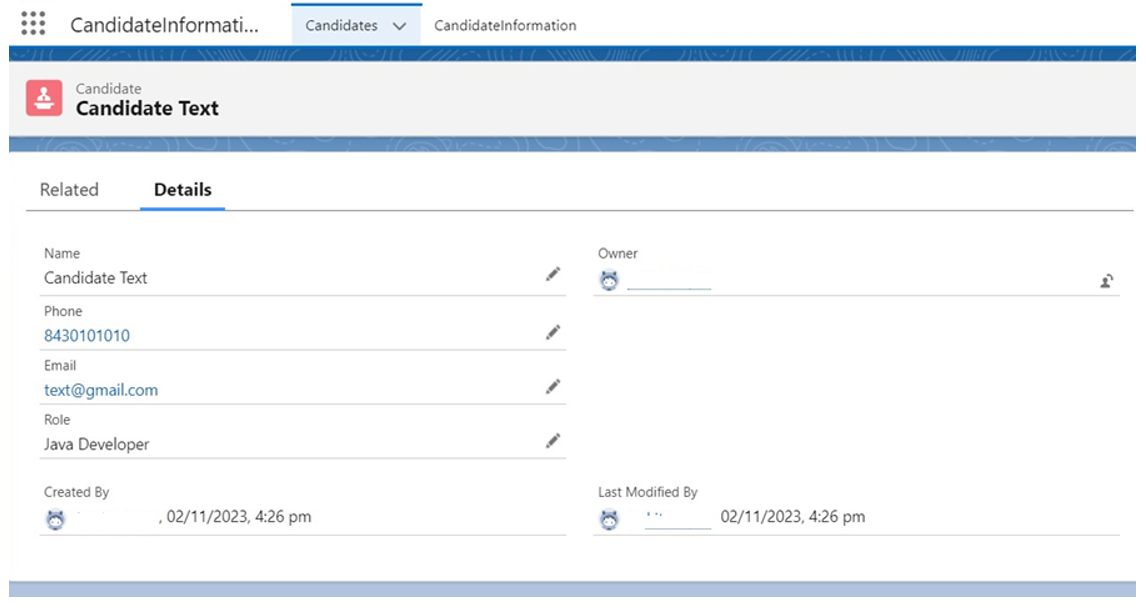
ORG A:
- Create Candidate Record using LWC Component.
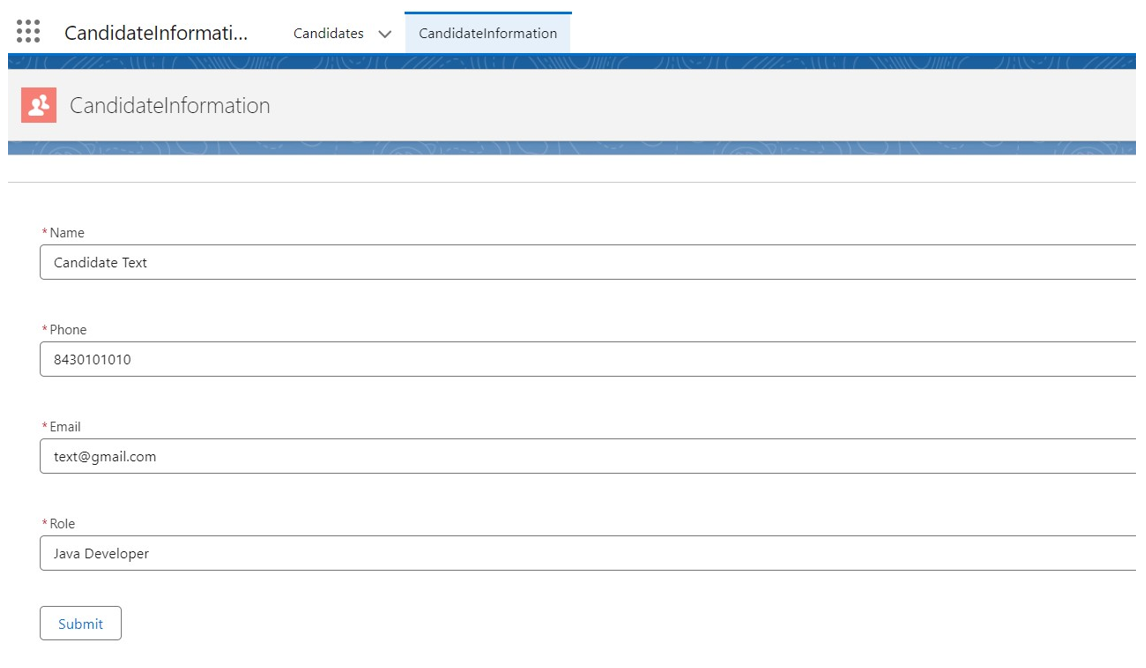
- After submitting.
- Saved the record on the Candidate Record Page of Org A.
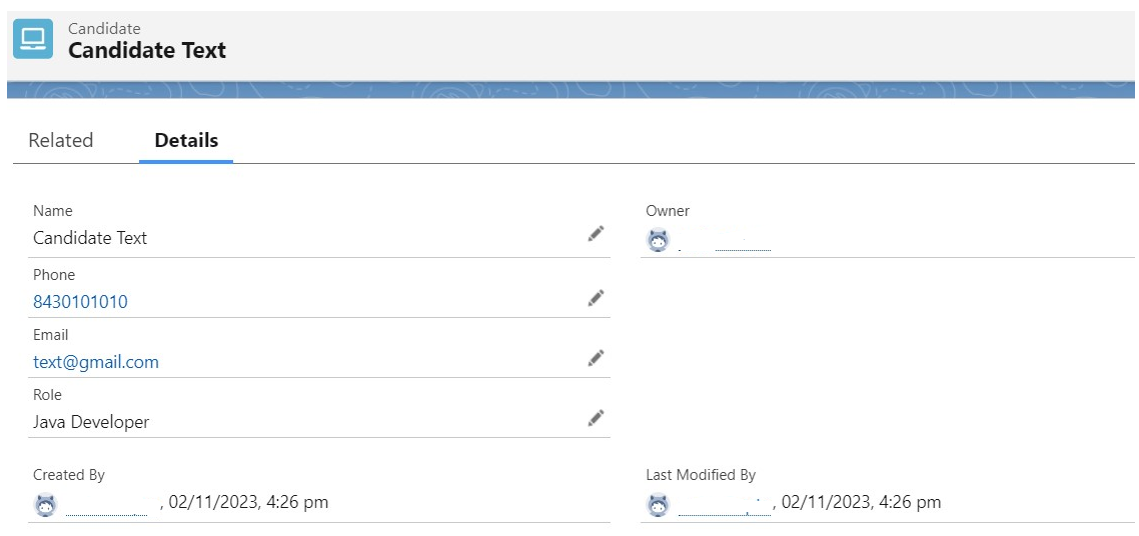
ORG B:
- Created record in Org B.
Conclusion:
You’ve learned how to transfer data between Salesforce Org A and Org B using Salesforce Integration. With a Connected App in Org B and Authentication Provider and Named Credential in Org A, data moves seamlessly. Whether you’re new or experienced with Salesforce, this guide equips you for efficient data integration. Start sharing data easily between your orgs to boost your business operations.
Leave A Comment