Your organization is using both AWS and Salesforce, and you want to establish a robust integration between the two platforms. The primary goal is to automate data flow and ensure real-time data synchronization, reducing manual efforts and data inconsistencies. To achieve this, we’ll use Dell Boomi, a cloud-based integration platform that simplifies the process of connecting different applications and systems.
Prerequisites:
1. Create/Have an AWS account.
- https://aws.amazon.com/console/
- Click on Sign…….
- IF you do not have an AWS account so create the account following these steps:
- Go to the AWS website (https://aws.amazon.com/console/) and click on the “Create an AWS Account” button at the top right corner of the page.
- Enter your personal details with your email address then sign up.
- You need to credit card/debit card the create an AWS account.
2. Create/Have a Salesforce account.
- https://login.salesforce.com/?locale=in
- Click on Sign…….
- IF you do not have a Salesforce account so create the account following these steps:
- Go to the Salesforce website (https://login.salesforce.com/?locale=in) and click on the “Try for Free” button.
- Enter your personal details with your email address then sign up.
- After that you will get a mail then you can reset your password.
3. Create/Have a Dell Boomi Account.
- https://platform.boomi.com/
- Click on Sign…….
- IF you do not have a Dell Boomi account so create the account following these steps:
- Go to the Dell Boomi website (https://boomi.com/form/trial/) and click on the “Free Trail” button.
- Enter your First Name, Last Name, business email address, and some more details then submit.
- You will get a mail after submitting your detail then you can reset your password.
- Now you can log in to your Dell Boomi account after following all the steps.
4. Basic knowledge of AWS and Salesforce.
AWS:
AWS documentation: https://docs.aws.amazon.com/
Salesforce:
Salesforce documentation: https://developer.salesforce.com/docs/
Dell Boomi:
Dell Boomi Integration documentation: https://help.boomi.com/category/integration
Here are the steps for How to connect AWS and Salesforce Using Dell Boom:
Step 1: AWS
AWS is an Amazon Web Service by Amazon that provides on-demand cloud computing and some tools to use for sending email, data access, and so on.
1. Create an AWS Elastic User:
Amazon Web Services (AWS) Elastic Compute Cloud (EC2) is a web service that provides resizable compute capacity in the cloud. It allows users to create a username and give permission to the user.
Here’s how to create an AWS Elastic User:
- Open the link.
- https://us-east-1.console.aws.amazon.com/iamv2/home?region=us-east- 1%23/security_credentials
- Navigate to Access Management >> Users >> Add Users
- Enter Username>> Next.
- Permissions Options >> Attach Policies directly
- Permissions Policies >>Give Amazon S3 Full Access Permission >>Next.
- Review the details and Click on the button ‘Create User’. Below AWS Elastic user record in AWS gets created.
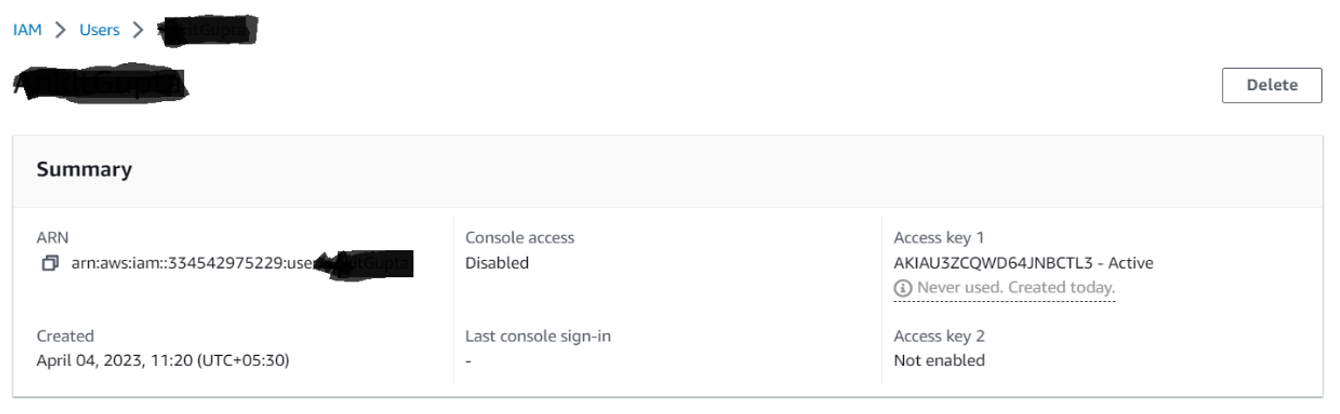
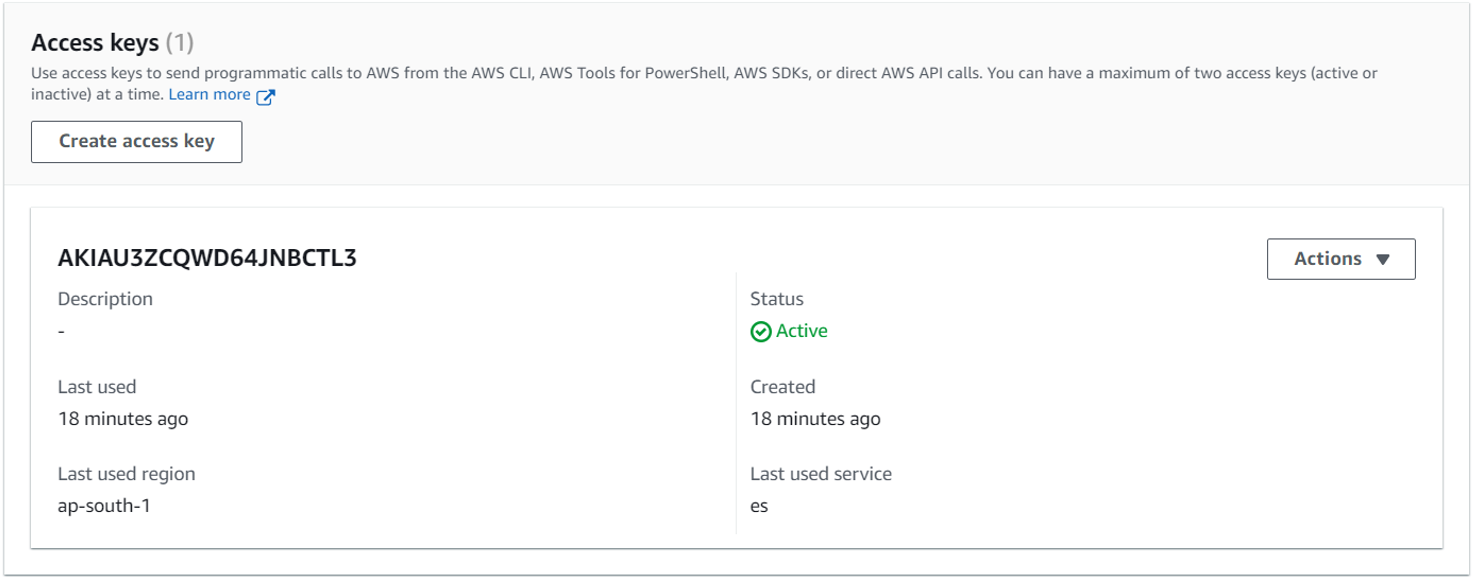
2. Create Access keys:
Amazon Web Services (AWS) provides access keys and secret key that allow user to connect and access from the AWS.
Here’s how to Create Access keys:
- Click on your AWS Elastic User >> Security Credentials >> Create Access keys.
- Application running outside AWS >>Next >>Next>> Done.
3. Create AWS S3 Bucket and upload the file.
Amazon S3 (Simple Storage Service) is a highly scalable and durable object storage service provided by Amazon Web Services (AWS). We need to update the file in Amazon S3 Bucket after that we can access outside the salesforce.
Here’s how to Create AWS S3 Bucket:
Create Bucket in AWS S3.
Upload the file in a bucket and give the permission as Everyone (public access) (Read)
Step 2: Dell Boomi
Dell Boomi is a cloud integration platform for connecting the cloud and On-Prem applications and it also has ETL capabilities. It is an IPAAS (Integration Platform as a Service)
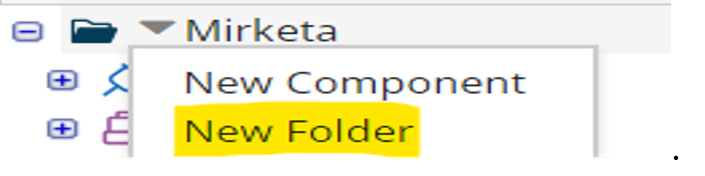
1. Create a folder and Process in the Boomi.
 Create a New Process in the Dell Boomi.
- Create New >> Process >> Start with No Data.
 Create a New Process in the Dell Boomi.
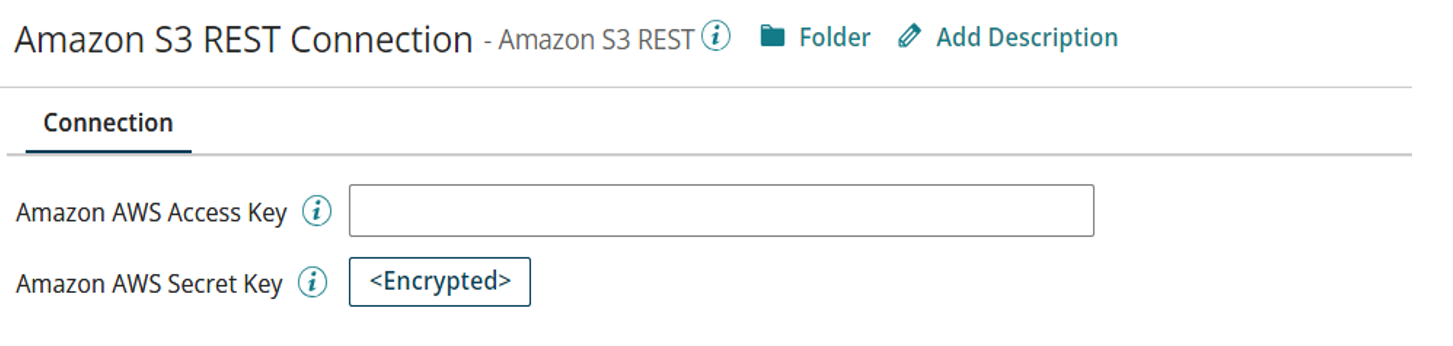
2. Create the Amazon S3 Connection.
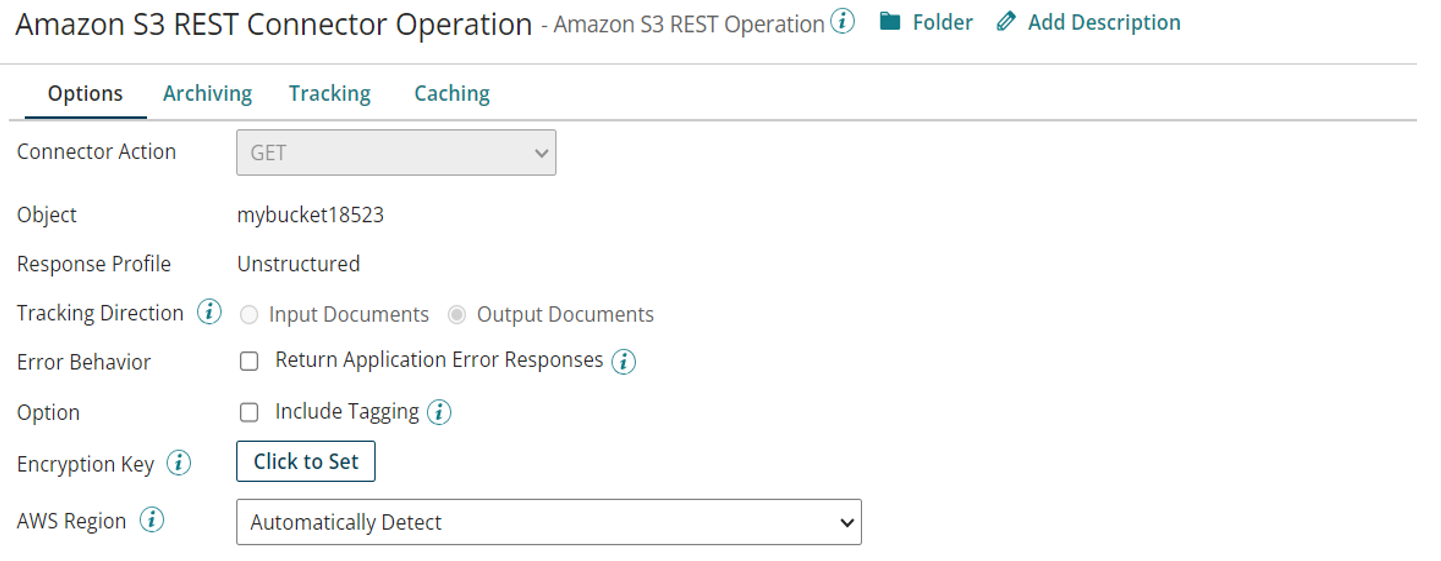
- Add the Amazon S3 REST Connector with GET Action.
- We need to add Connection and Operations.
- Connections >> Like, Amazon S3 REST Connection
- Give Amazon the access key and secret key.
- Operations >> Like, Amazon S3 REST Operations.
- Click on Import button >> fetch your bucket which is present in AWS S3 >> Finish.
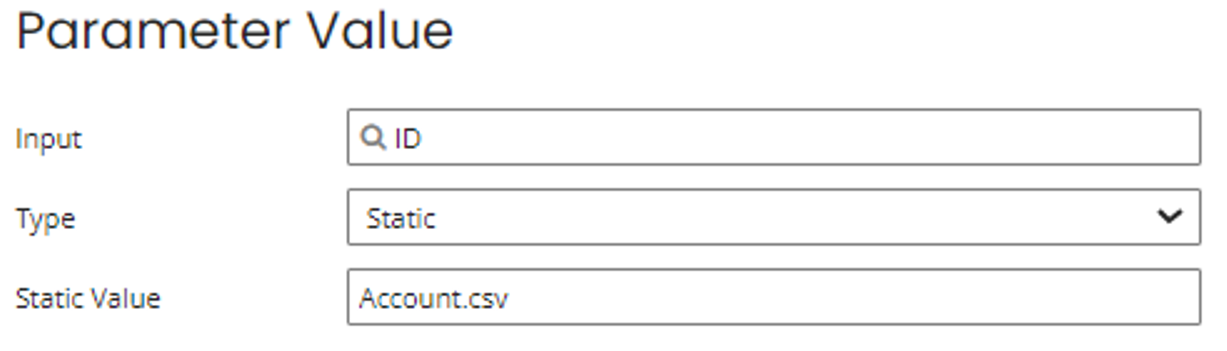
- Add the Parameter that is Id and the static value is that file name which is present in AWS.
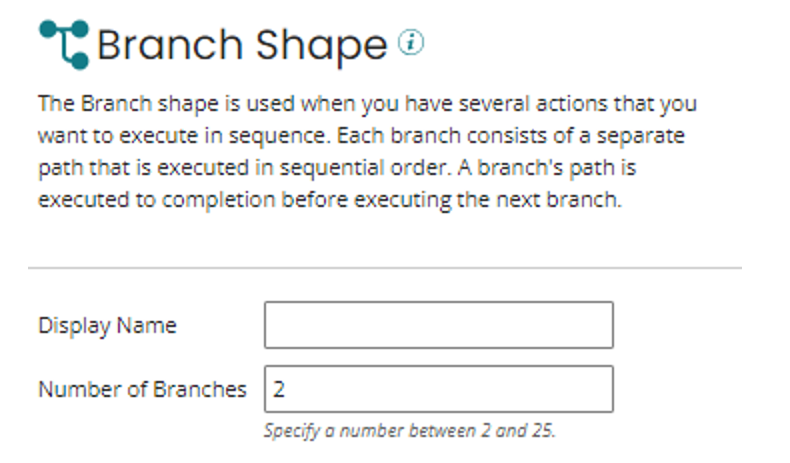
3. Create Branch Shape
- Branch shape is used when you have multiple action, but you want to execute one by one.
- There we have created 2 branches because we want to create/upset account records after create account link by account.
- We need to first branch create/upset accounts with an external id.
- After that, the second branch creates contact with an account using an external id.
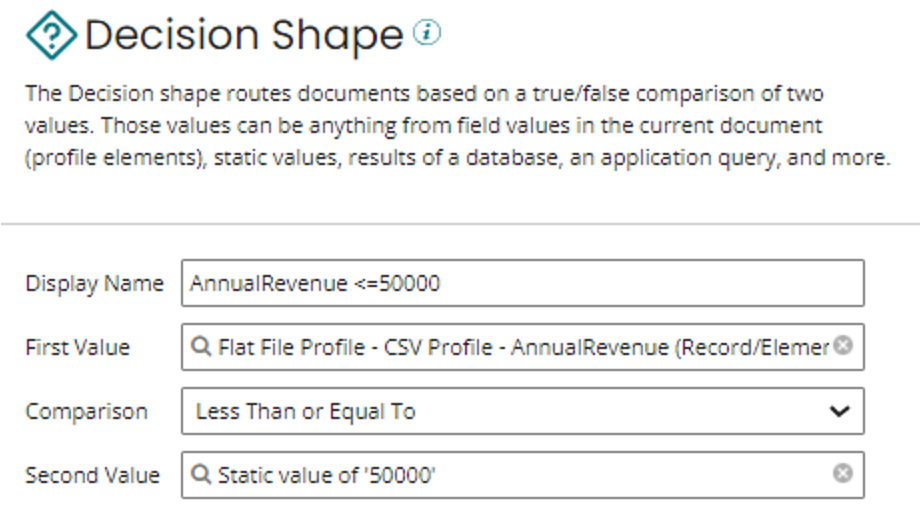
4. Create a Decision Shape in Branch 1:
- The Decision Shape is the comparison of two values according to true/false.
- As of now, we have written decision shape according to AnnualRevenue <=50000
- If it is true, then save the account record with one filed custom (Unchecked).
- If it is false, then save the account record with one filed custom (Checked).
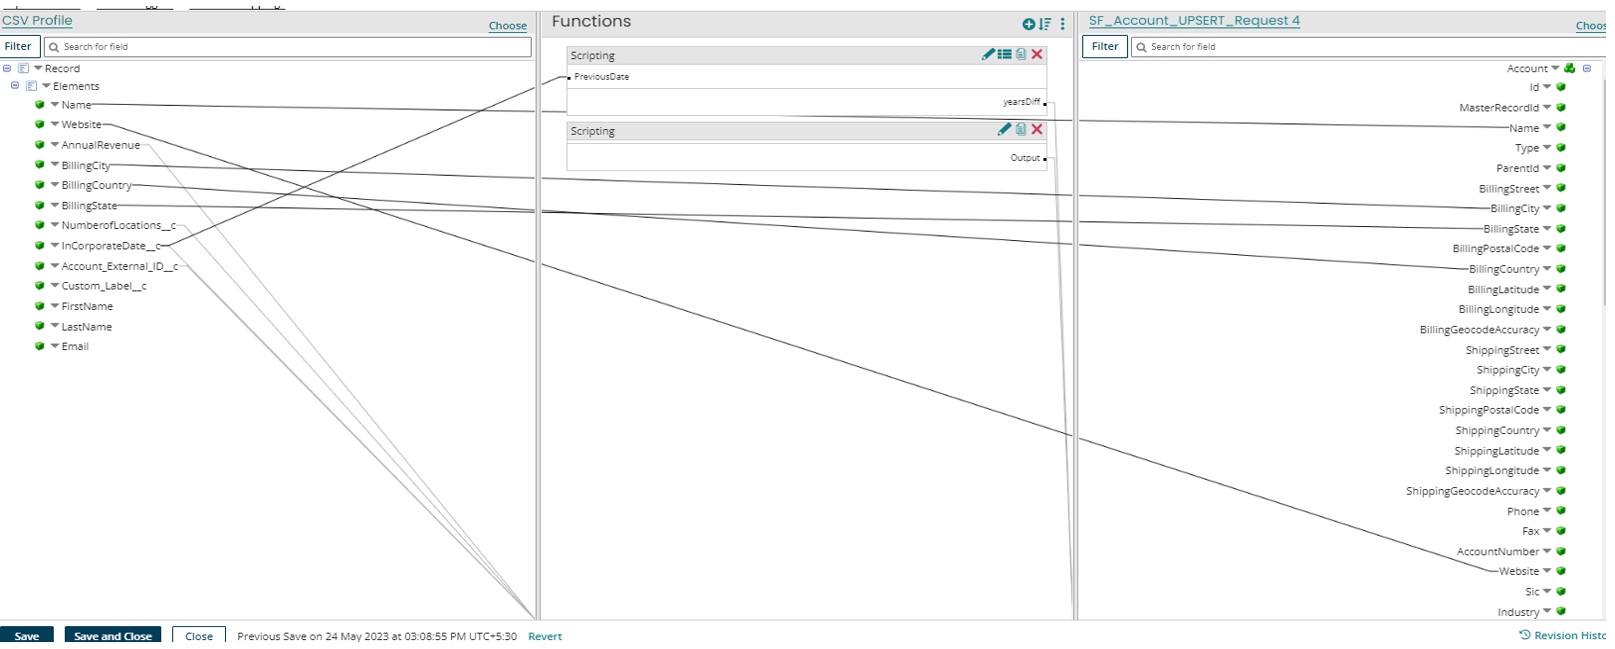
5. Create Map Shape
- Map shape is used for mapping the fields.
- We can use also use formulas in the map.
- We have created map and create account and contact according to AWS file field.
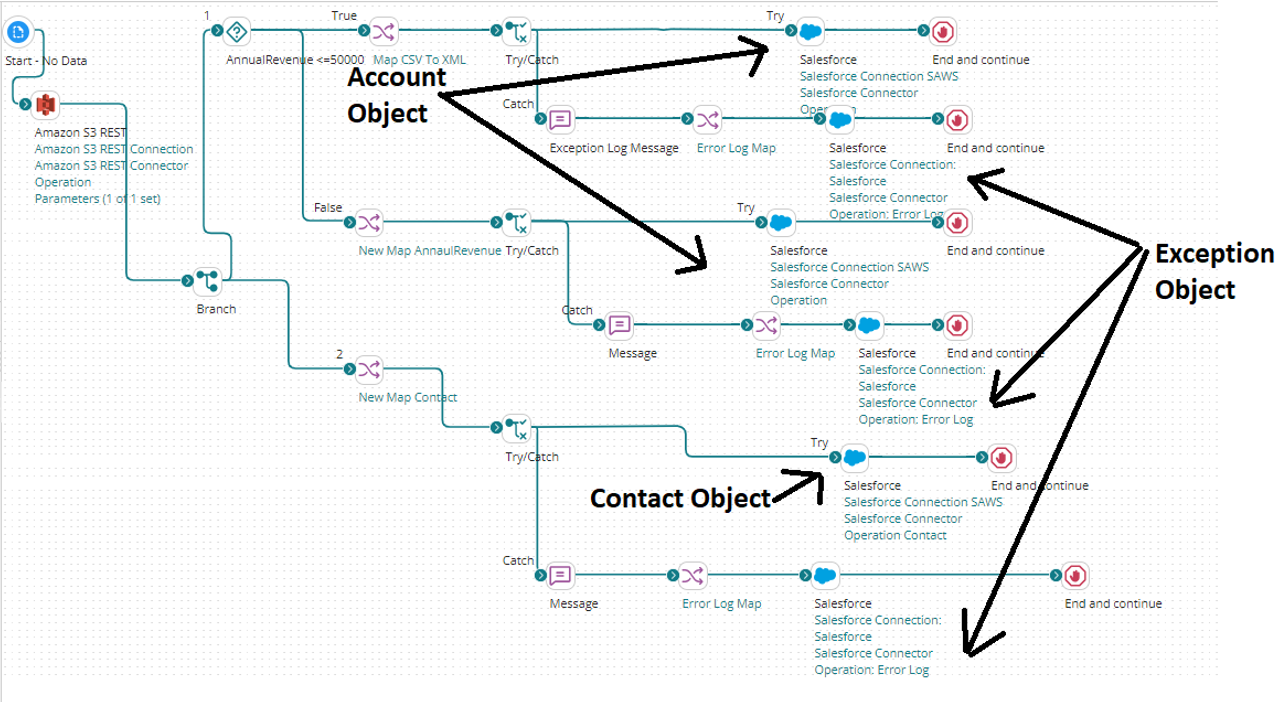
6. Create Try/Catch Shape
- When we are using try/catch shape if you want to catch your error.
- Here we are using try/catch, In the try block, we are storing data in the salesforce account and contact object.
- In the catch block, we catch errors and map the field, and store errors in the salesforce error object.
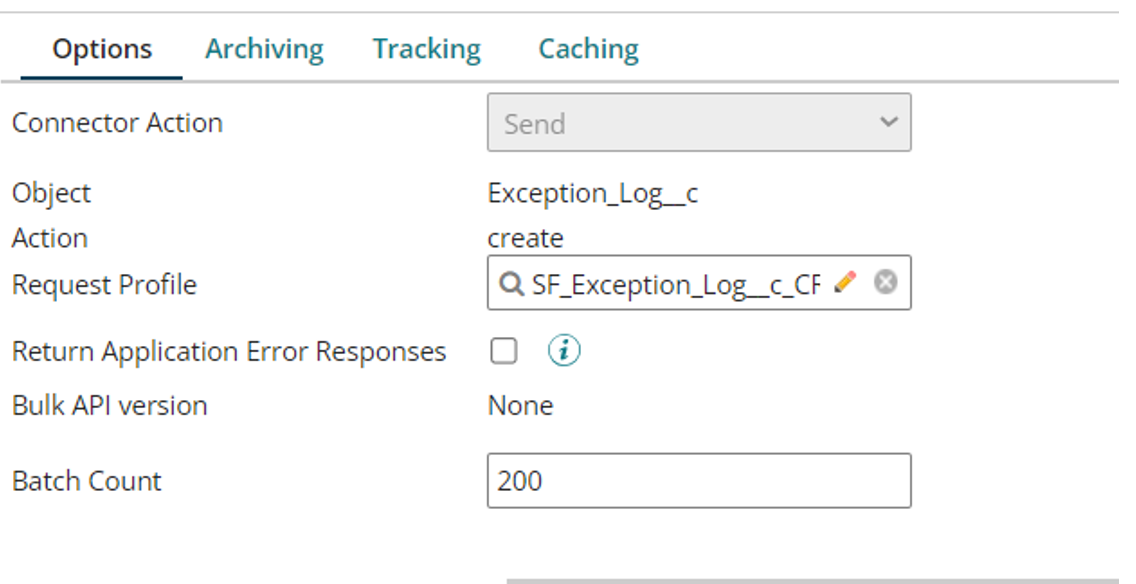
7. Create Salesforce Connector
- Add Salesforce Connector according to the Account/Contact/Error object with Send Action.
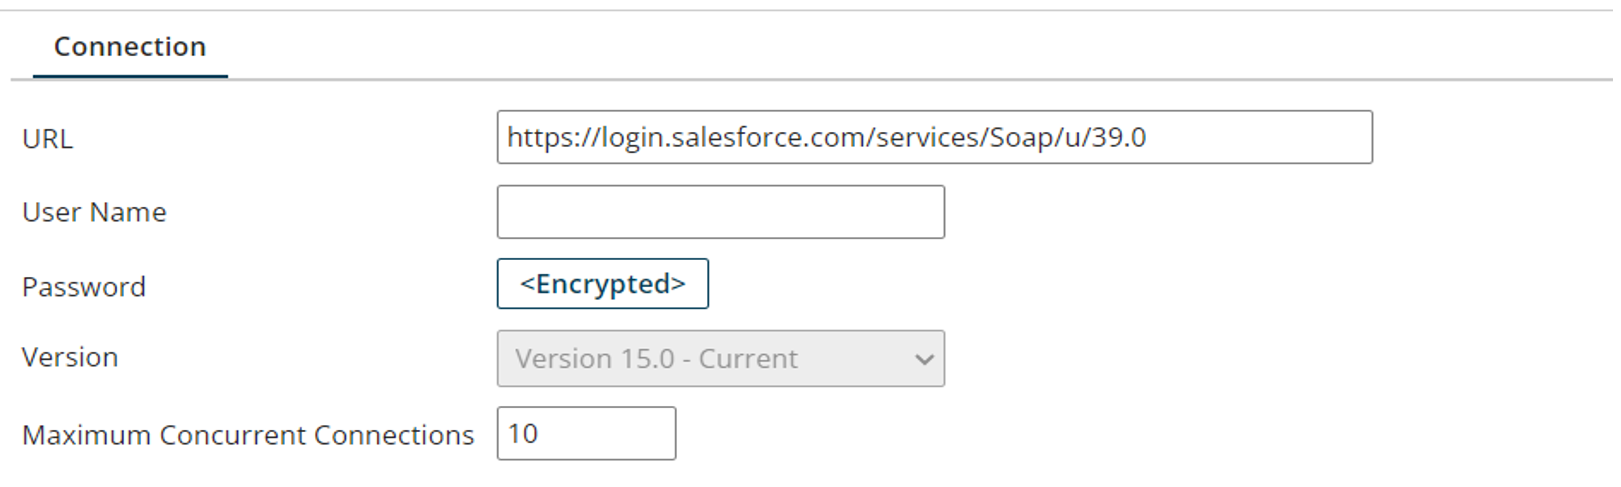
- We need to add Connection and Operations.
- Connection is the same for all the objects. Username >> your salesforce username and Password >> salesforce password + security token.
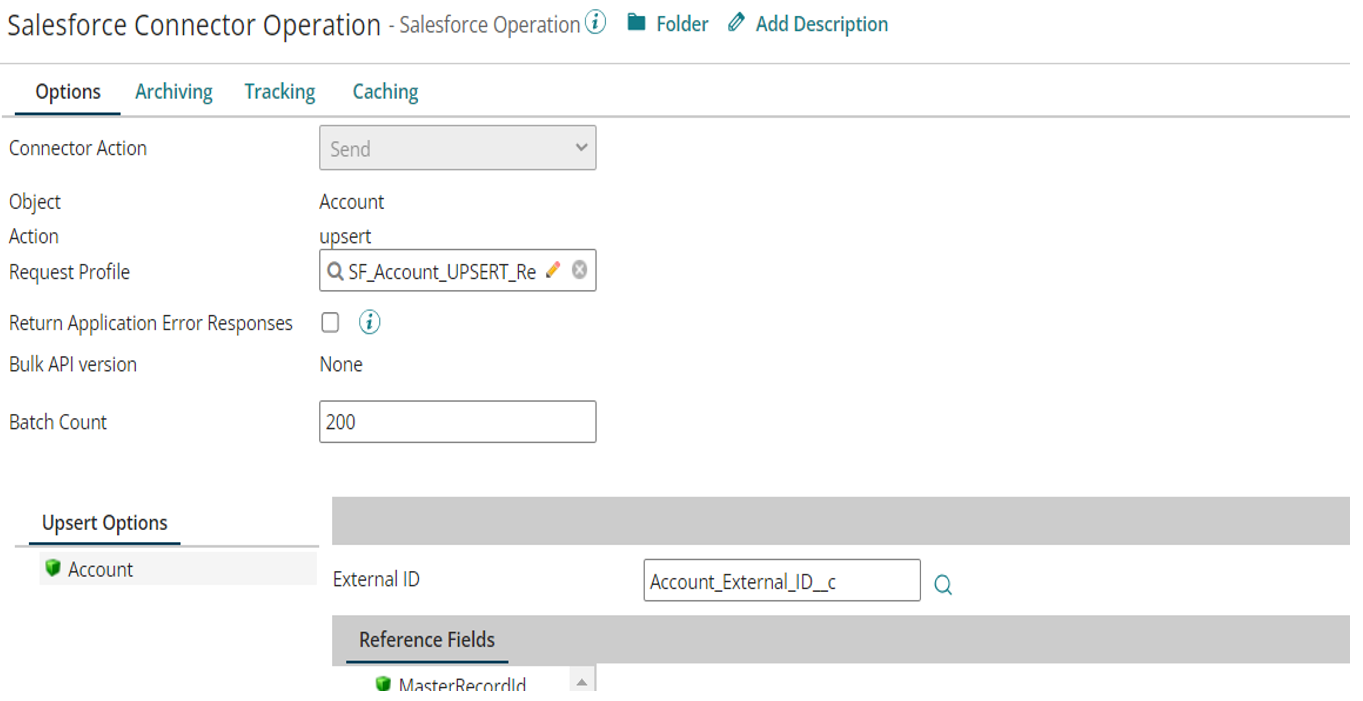
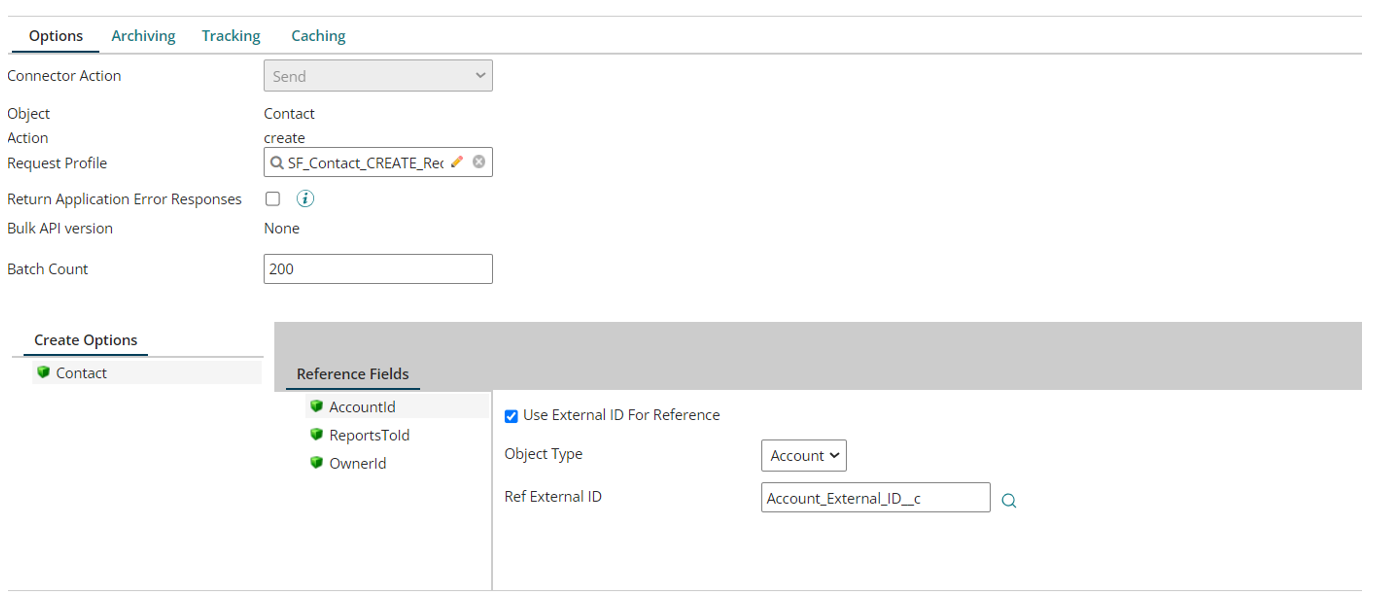
- Operation is different according to the object.
- Import >> Choose your connection >> Next >> Choose object (Account/Contact/Error) and choose action (Create/Upsert/Update/Delete) >> Next >> Finish.
- For Account Object. We have added the Account_External_Id__c field for External ID.
- For Contact Object, Account ID >> Account (Object Type) , Account_External_Id__c (Ref External ID).
- For Exception Log Object to store the error.
8. Create an End/Stop Shape
The Stop Shape provide to terminate the data flow in process path.
9. Overall Process
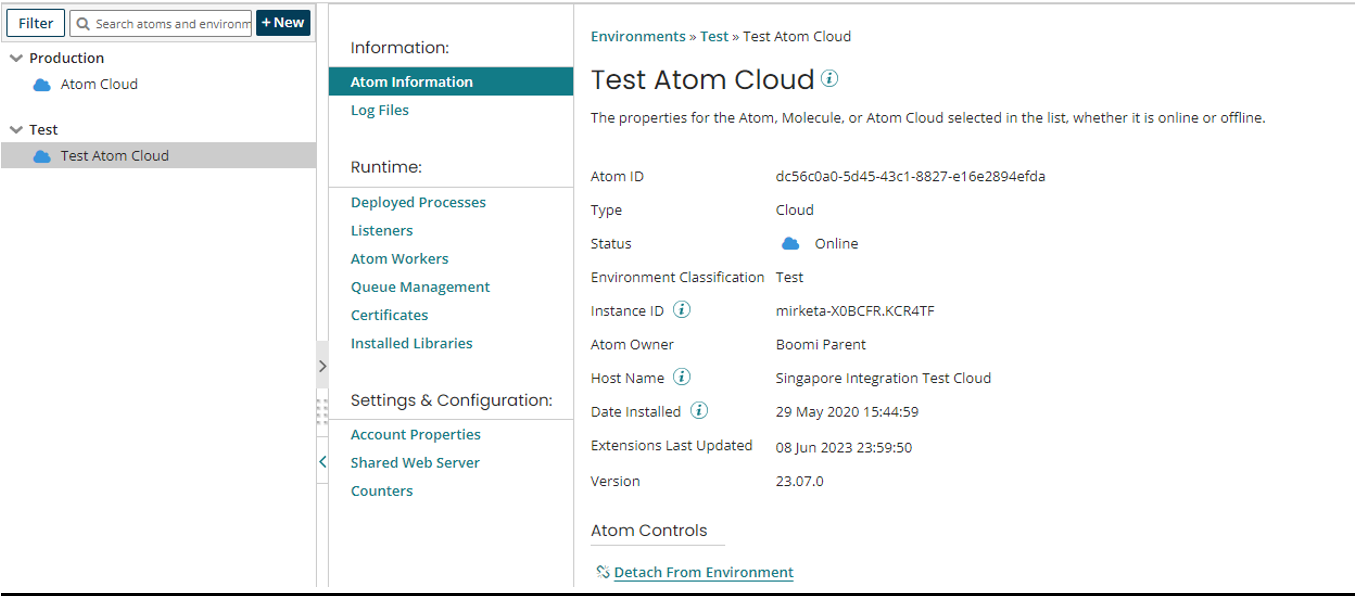
10. Atom and Environment
- Atom: The Atom Cloud is a highly scalable, highly available execution environment that can support many users.
- Manage >> Atom Management >> New Atom (For Prod and testing).
- Environment: An Environment is a workspace that users create for testing or production.
- Manage >> Atom Management >> New Environment (Add Atom for Prod and testing).
11. Test Mode
- Test Mode allows u to quickly test processes from the build page without deploying the process to an atom.
Click on the Test button >> Select Test Cloud >> OK.

12. Deployment
Deployment is how you prepare your processes and components to run and operate in a Test or Production Environment
Deployment Steps:
- From the Build tab, select Create Packaged Component >> Next: Add Details
- Version >> IE-MONYYYY-01, Package Notes >> Initial Package, click Not Allowed, Press Create Packaged Component(1) >> Close >> Deploy >> Packaged Components.
- Action >> Deploy >> Production, notes >> initial deployment >> Select Versions >> Review >> Deploy >> View Deployments.
Conclusion:
Integrating AWS and Salesforce using Dell Boomi streamlines your organization’s data flow and eliminates manual data handling, enabling you to make better-informed decisions and enhance operational efficiency.
Leave A Comment