Marketing Cloud is primarily utilized to store client data for sending emails and monitoring consumer interactions. Through the Marketing Cloud Connector, emails can be sent directly from Salesforce, and the details within these emails are monitored within Salesforce. The integration is finalized by mapping users from Marketing Cloud to Salesforce. To integrate Marketing Cloud with Salesforce CRM, please follow the steps outlined below:
Installing Marketing Cloud Package in Salesforce
To set up the Marketing Cloud Package in Salesforce, follow these steps:
1. Begin by installing the Salesforce Marketing Cloud Package:
a. For Sandbox org, use this link:
https://test.salesforce.com/packaging/installPackage.apexp?p0=04ti0000000Tj9E
b. For Production org, use this link:
https://login.salesforce.com/packaging/installPackage.apexp?p0=04ti0000000Tj9E
2. Once logged in, choose the installation scope: admin only, all users, or specific profiles.
3. Proceed by clicking the “Install” button.
4. Confirm the installation by clicking “Continue.”
After installation, the following permissions are applied:
1. Navigate to Setup ➔ Object Manager ➔ Search for “User” ➔ Click on User Page Layouts ➔ Edit
the user page layout
2. Add the “Marketing Cloud for AppExchange User” field.
3. Add the “Marketing Cloud for AppExchange Admin” field, then click the Save button.
To configure Salesforce System Users, follow these steps :
1. Go to Setup ➔ Users ➔ Edit the Salesforce CRM administrator user
2. Confirm that the user is assigned the System Administrator profile.
3. Activate “Marketing Cloud for AppExchange User.”
4. Activate “Marketing Cloud for AppExchange Admin.”
5. Click Save.

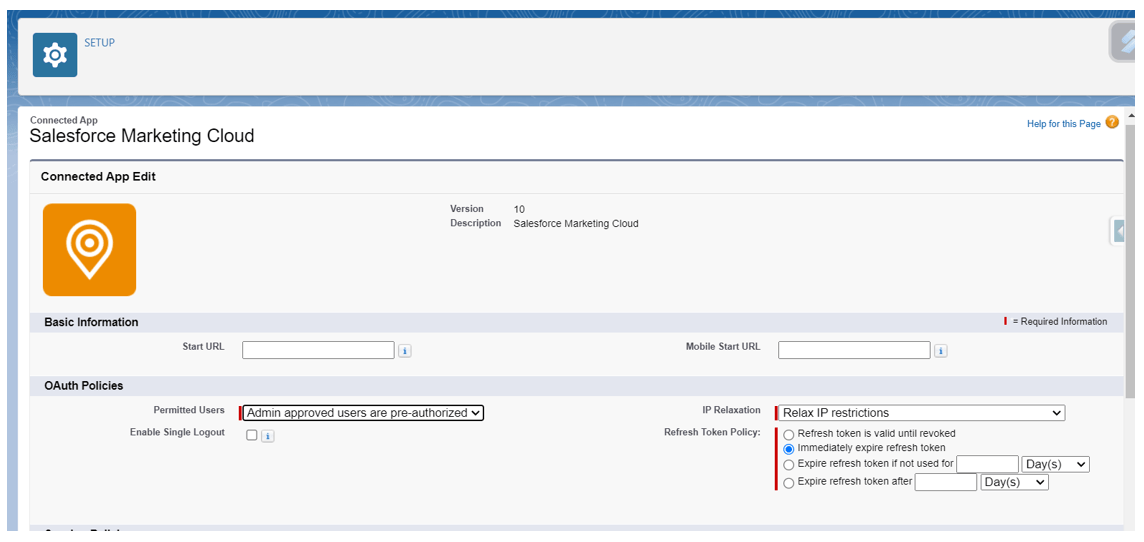
To set up the Salesforce Connected App, follow these steps:
1. Navigate to Setup ➔ Apps ➔ Connected Apps ➔ Salesforce Marketing Cloud.
2. Click on Edit Policies ➔ Under Permitted Users, choose “Admin approved users are pre-authorized.”
3. If a warning message appears, click OK
4. Under IP Relaxation, choose “Relax IP restrictions.”
5. Under Refresh Token Policy, select “Immediately expire refresh token.”
6. Save the changes.
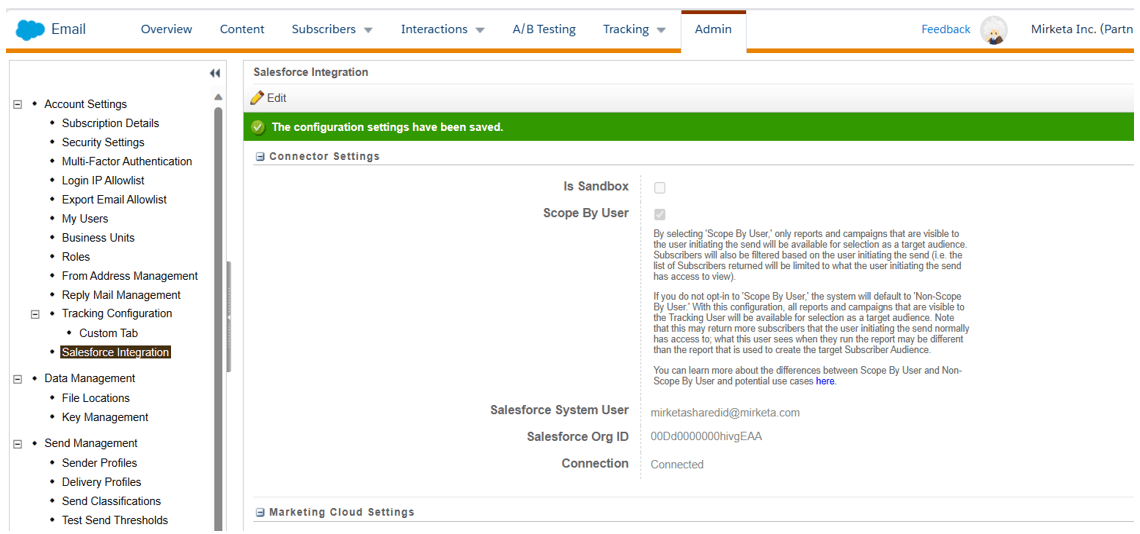
To log in to the Marketing Cloud Org, follow these steps:
1. In Email Studio, navigate to Admin ➔ Salesforce Integration ➔ Edit
2. If applicable to your data access configuration, choose “Scope by User.
3. Click “Upgrade to Connection” ➔ Click “Connect Account.”
4. If you are not logged into the Sales or Service Cloud as your Salesforce system user in a different tab, you will be prompted to log in.
5. Click OK and complete the login process.
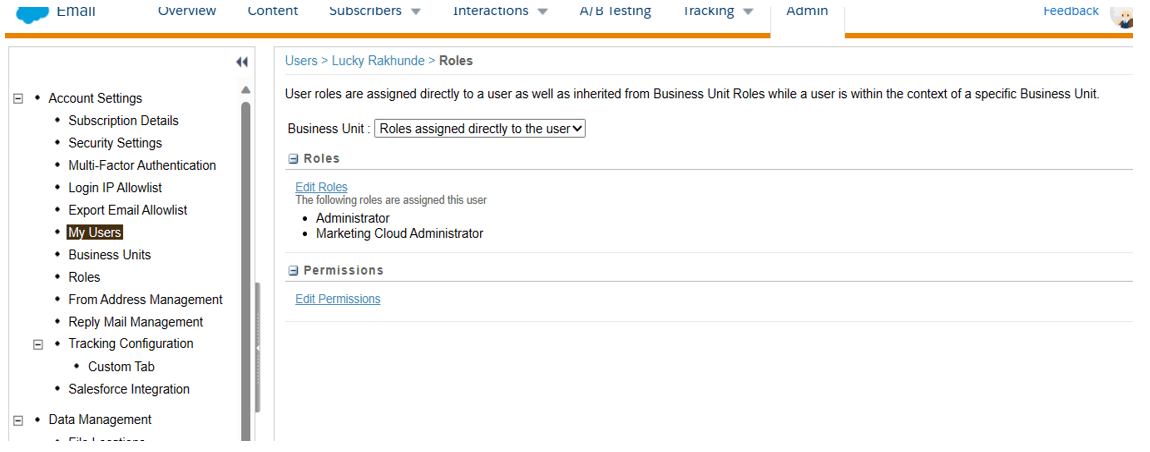
To create a Marketing Cloud User API, follow these steps:
1. Navigate to Email Studio ➔ Admin ➔ My Users ➔ Select the API User.
2. Click on “Manage Roles.”
3. Select “Edit Roles” and assign the following roles:
a. Administrator
b. Marketing Cloud Administrator
4. Save your changes
5. Click to Edit API User.
6. Check the API User checkbox ➔ Save.
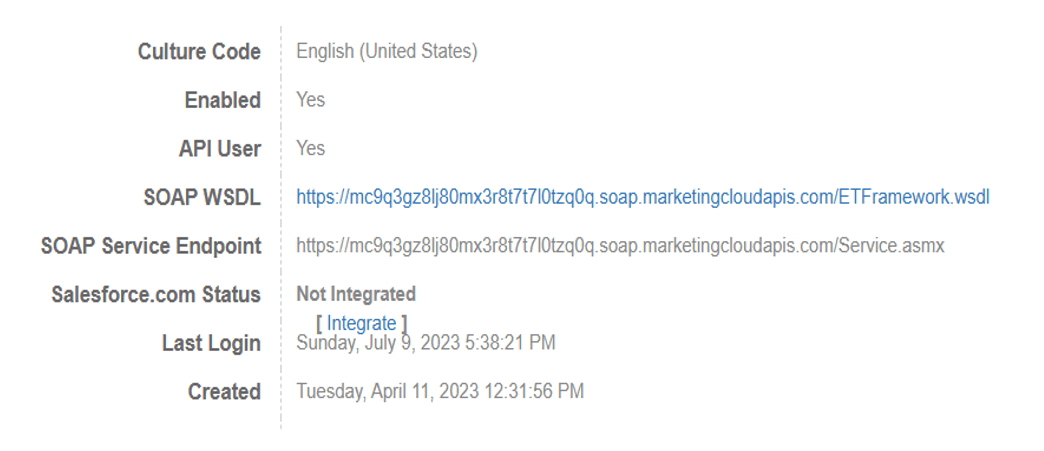
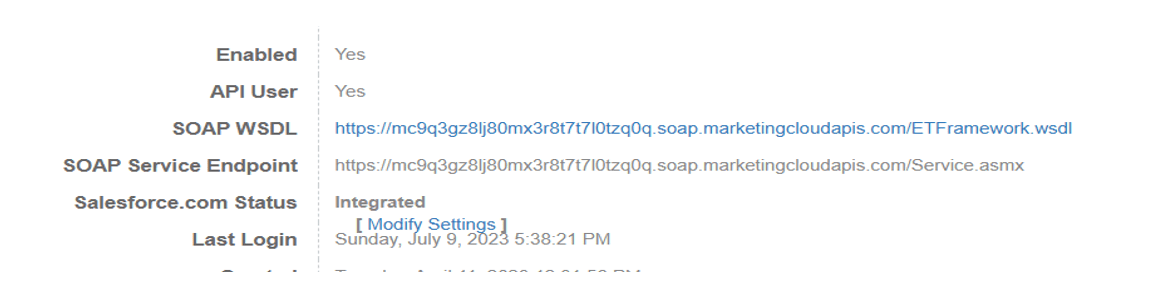
To link the Marketing Cloud API User, follow these steps:
1. Navigate to Email Studio ➔ Admin ➔ My Users ➔ Select the API user.
2. Click on “Integrate for Salesforce.com Status” ➔ Enter the SFDC Username ➔ Save the settings.
3. If the connection is successful, the Salesforce.com Status field is updated to “Integrated.
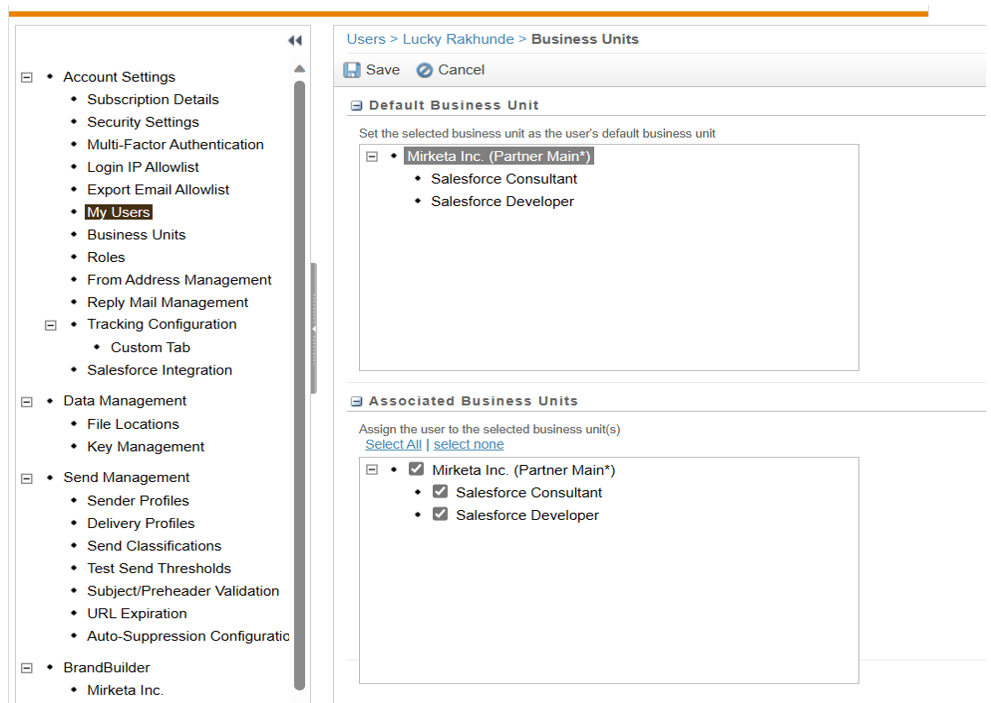
To designate a Business Unit, follow these steps:
1. In the Marketing Cloud, go to Email Studio.
2. Click on Admin ➔ My Users ➔ Select the API User
3. At the top of the Users table, click on “Manage Business Units.”
4. In the Associated Business Units section, select all business units to be used with Marketing Cloud Connect.
5. Save your changes.
6. Click on Setup ➔ Manage Users ➔ Permission Sets.
7. Click “New” ➔ Give the permission set a unique name (e.g., SFMC Connected App).
8. Save the permission set.
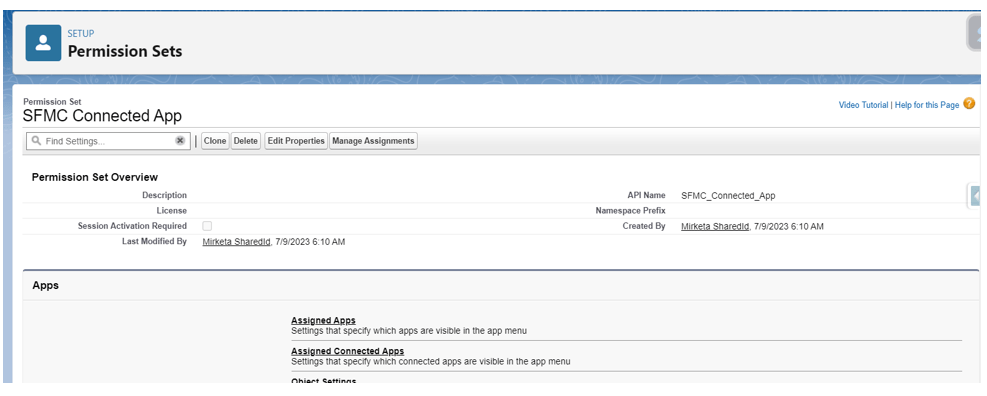
9. Again, click on Setup ➔ Manage Users ➔ Permission Sets.
10. Click the name of the newly created permission set ➔ Click “Manage Assignments” ➔ Click “Add Assignments.”
11. Select the users who need to access the connected app.
12. Ensure the Salesforce system user is selected for access ➔ Click “Assign” ➔ Click “Done.”
To add the ‘Email Opt Out’ field in the Lead and Contact objects, follow these steps:
1. Navigate to Setup ➔ Object Manager ➔ Lead and Contact Object.
2. Under Page Layouts, click “Edit page layout.”
3. Add the ‘Email Opt Out’ field to the page and save.
4. This ensures that the Email Opt Out functionality will update correctly whenever the subscriber clicks the unsubscribe link.
To configure settings in Sales and Service Cloud, follow these steps:
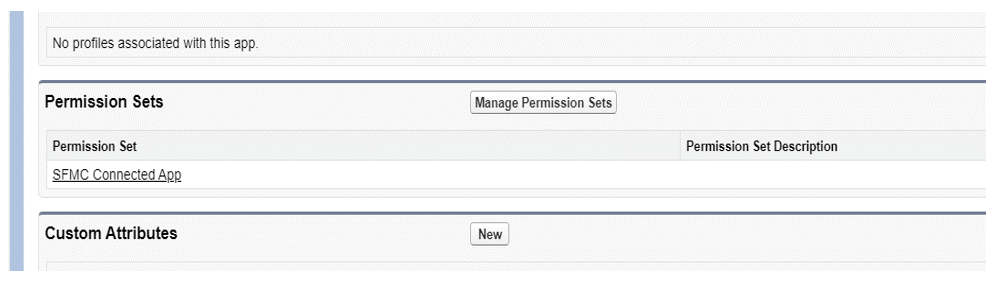
1. Go to Setup ➔ App Manager ➔ Connected Apps (Salesforce Marketing Cloud) ➔ In the drop-down, select Manage.
2. Click on “Manage Permission Sets.”
3. Select the newly created permission set.
4. Save changes.
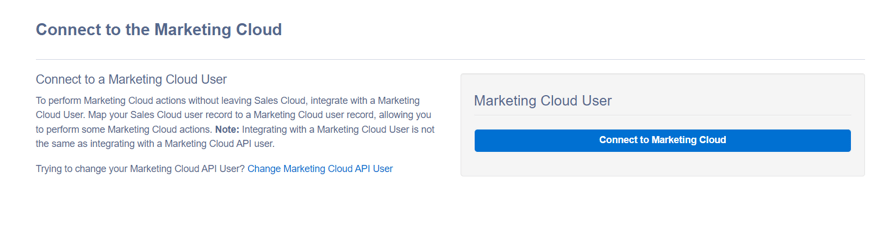
To connect to the Marketing Cloud, follow these steps:
1. Use the App Launcher ➔ Click on the Marketing Cloud tab.S
2. If you are using a Marketing Cloud Production Support environment, click on Advanced Settings and select “Sandbox” from the Marketing Cloud Environment list.
3. Verify Remote Site settings ➔ Click on the ‘Verify Remote Site’ button.
4. Choose the Automatic Setup ➔ Click on “Start Wizard.
5. Click “Connect to Marketing Cloud.
6. Enter the username and password for the Marketing Cloud Connect API User.
7. Click “Login.”
8. Salesforce CRM and the Marketing Cloud have been successfully integrated.
Leave A Comment