Hearing the word flow in salesforce we start thinking about the workflow i.e. defining criteria and firing action. So the question arises that whether the flow is the amplified version of workflow or not? So the answer is a big no, flow is completely different from the workflow. Workflow lets you automate your process letting you select the objects, defining the criteria, and based on that criterion firing the immediate or time-dependent actions but this is not the case with the visual flows, visual flows structure collaboration between you and Salesforce. They were created to be interactive and perform best in situations where the system and user have something to contribute.

Visual Flows in Salesforce
|
Functionality |
Workflow rules |
Visual flows |
| How do they start? | Triggered by predefined criteria. | Triggered by clicking a link, button or user navigate to a specific URL. |
| What it can do? | Send an email, field update, send outbound messages, or fire existing actions. | Look up record, create a record, update a record, or delete a record. |
| Will it work across objects? | Yes, but for those objects who have a master-detail relationship. | Yes for all objects. |
| Can I add something visual? | No, workflow rules run only in the background. | Yes, we can add a screen to collect more information from the users |
| Can I add a time delay? | Yes, we can add a time trigger to a workflow. | No, flow performs only at the time of user interaction. |
| Can I perform multiple actions at a time? | Yes, up to 40 actions per trigger. | Yes, as many actions as you want. |
| Is it capable to make a decision? | Not really because it only evaluates the criteria defined weather it met or not. | Yes, flow can use decision elements to choose different actions based on some criteria. |
Action elements are the heart of a visual flow:
- Step Element: It acts as a placeholder when you’re planning your flow and don’t know which element you’ll need.
- Screen Element: It allows you to display and/or request information from the user Record.
- Lookup Element: It uses to get an existing record and store specified values in a regular variable and subject variable.
- Create Element: It creates a new record by using the value of the fields you’ve specified.
- Record Update Element: It updates one or more records that met the specified criteria and updates them with individual field value that you specify.
- Record Delete Element: It deletes one or more existing records based on the specified criteria. Be careful with this because it can trigger if the criteria met even if the flow is inactive.
- Assignment Element: It allows you to change the value of a variable, especially when you dealing with dates inflows.
- Decision Element: It evaluates a set of criteria to determine which action to take.
- Sub flow Element: It allows you to trigger another flow and pass the data into it.
- Apex Plug-in Element: It allows you to call an Apex class to pass data between your organization and the flow.
In visual you will find many other options as well and you can play with them as well.
Steps to create a new flow:
1- Goto setup -> create -> Workflow & Approvals -> Flow
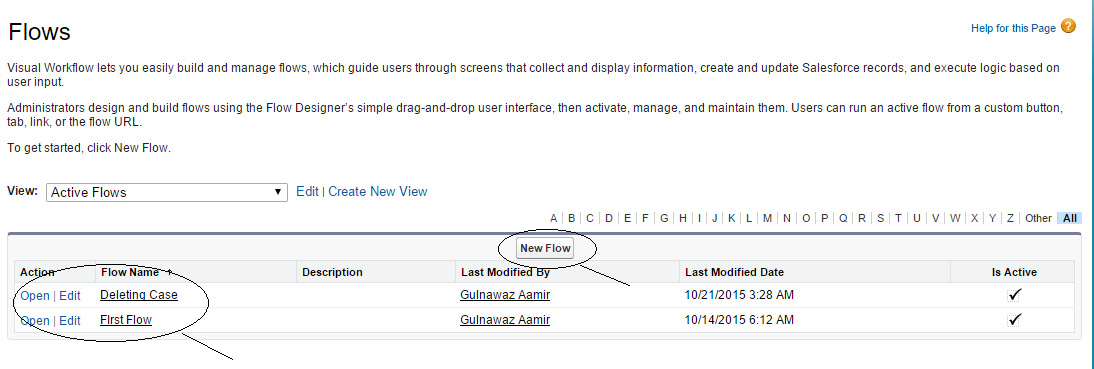
Here we have the list of previously created flows and buttons to create a new flow.
2-Now click on the New Flow button you will get the following screen.
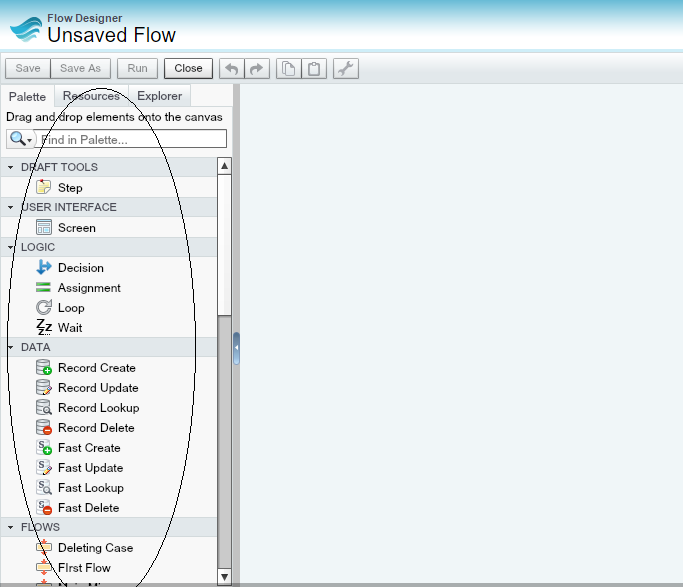
On the left-hand side you will find a huge and very useful list of tool which you will use to create your complete flow. By simply dragging the tools from left to right you can create your complete flow. Here is a small example of how your flow will look once you finish your dragging and dropping.
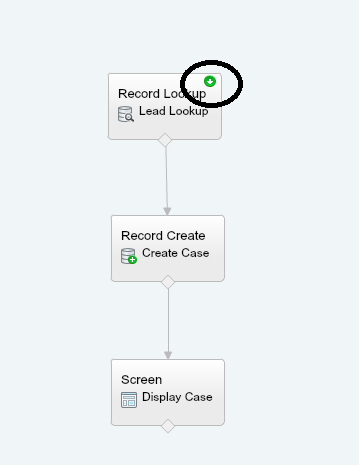
It’s just a small example for demo purpose, you can create as much powerful flow as you want according to your requirement. You can have multiple screens, decision logic, loops, assignment, create update lookup, or delete records, in short, you can have a powerful tool to fulfill your requirement just by dragging and dropping and not writing even a single line of code. One important thing here is, you need to define the starting point of your flow by clicking on the top corner of the box whom you want your starting point, as a circle in the above figure.
3- Once you are done with creating the flow save it by clicking the Save as button and then press the Close button, you will get the following screen.
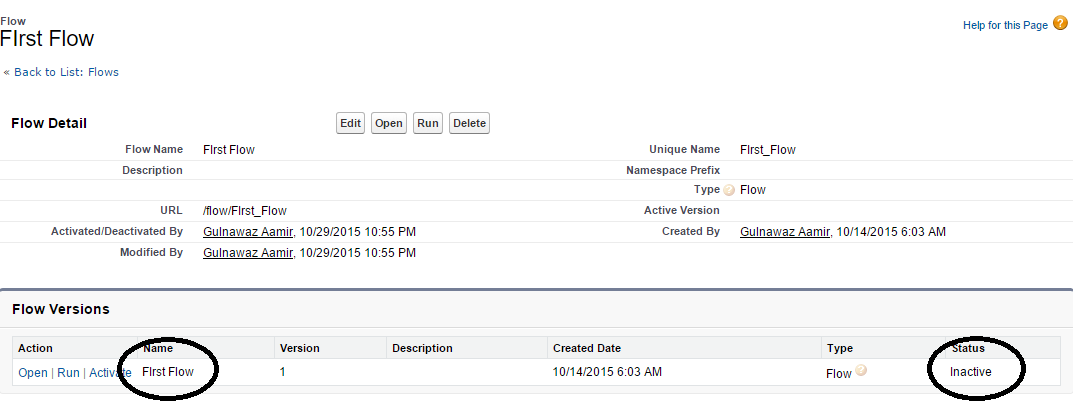
As you can see in the above figure you have created the flow but on the right-hand side the status of the flow is still inactive, it will not get active until you activate this explicitly by clicking on the activate button on the left-hand side. Once you activate your flow it is ready to work and will do the task you defined inside the flow.
Very nice post. I just stumbled upon your weblog and wished to say that I’ve truly enjoyed browsing your blog posts.